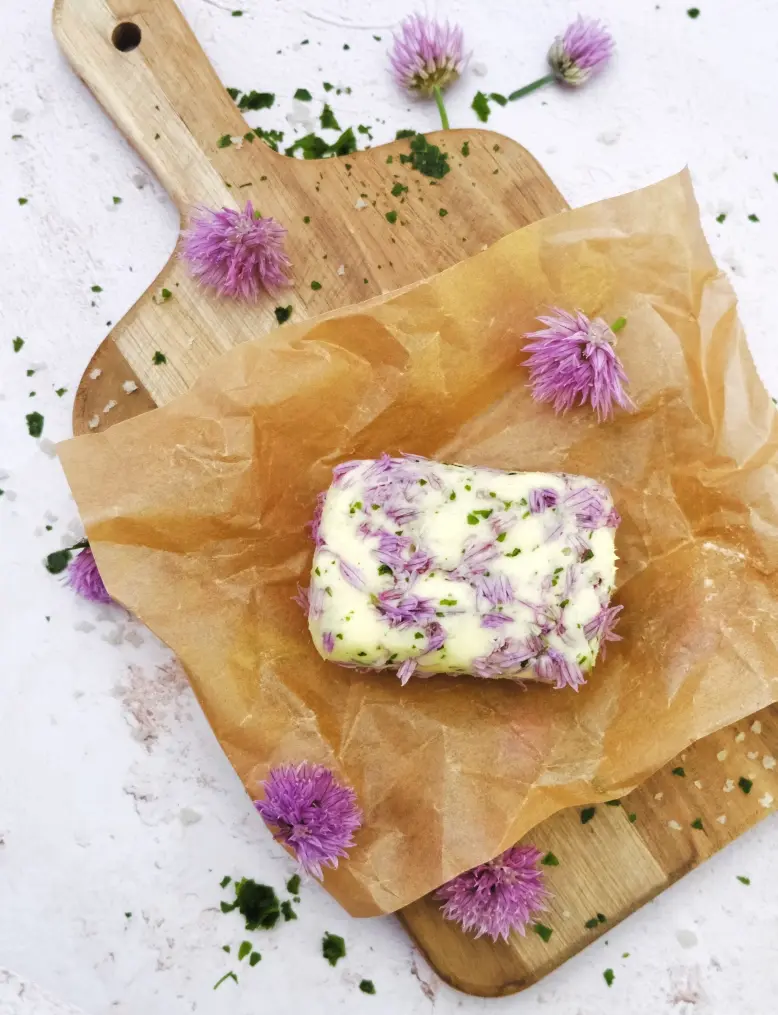
Chive Blossom Butter
Silky butter infused with delicate purple chive blossoms tastes like proper spring. The mild onion sweetness pairs brilliantly over grilled fish, spring vegetables, or just perfect on crusty bread. Stunning presentation, sublime taste!
Ingredients
- 15 g chive flowers washed and dried
- 115 gr salted butter
- 2 tbsp parsley or chive stems
- salt and black pepper
Equipment
- tea towel for drying flowers
Instructions
1. Prep the chive flowers
- Wash the chive flowers thoroughly but gently under cold water. They're delicate. Pat them completely dry with a clean tea towel. Any moisture left on them will make your butter weep and shorten its shelf life.Once dry, separate about 5 flowers and set them aside. These are for decoration. Pull the petals off the remaining flowers, you want individual petals, not whole blooms for mixing into the butter. Discard the green stems and any bits that look past their best.
2. Soften the butter
- Your butter needs to be nice and soft, room temperature, easily spreadable, but not melting. Take it out of the fridge about an hour before you start. If you've forgotten, cut it into small cubes and it'll soften faster.Don't microwave it. Melted butter doesn't work for this. You need it soft enough to mix but still holding its shape.
3. Mix the butter
- Put the softened butter in your bowl. Add the chive flower petals (not the whole flowers you set aside) and the chopped parsley or chives stems. Add a good grinding of black pepper. Mix everything thoroughly with a fork or wooden spoon until the petals and chives are evenly distributed throughout the butter.The butter can turn slightly purple-pink from the flower petals. This is normal and looks brilliant once it's done.
4. Shape the log
- Lay out a piece of cling film on your work surface. Dampen the surface slightly first, it helps keep the cling film in place whilst you're working.Spoon all the butter mixture onto the cling film, forming a rough line down the centre. Leave a border of about 2cm on each side. Now fold the cling film over the butter and start rolling it into a log shape, about 2.5cm (1 inch) in diameter.Roll it tightly and twist the ends like a Christmas cracker to seal. The tighter you roll, the neater your slices will be later.
5. Chill until firm
- Pop the butter log in the fridge for 2 hours minimum, or until it's completely firm. You need it solid for the next step, if you want to decorate it.Or, you can use your butter straightaway as it is!
6. Apply the decorative flowers
- This is the bit that makes it look properly impressive. Take the butter log out of the fridge and unwrap the cling film. Let it sit at room temperature for 2 minutes, you want it slightly softened on the outside but still firm inside.Take your reserved whole chive flowers and break each one into 2-3 sections. Press these flower sections gently but firmly into the outside of the butter log, distributing them evenly around the surface. They should stick to the slightly softened butter.Once you've applied all the flowers, rewrap the log in fresh cling film and roll it gently to help the flowers adhere properly. Back in the fridge for another 30 minutes to firm up completely.
7. Slice and serve
- When you're ready to serve, unwrap the butter and use a sharp knife to cut it into rounds. For clean slices, run the knife under hot water and dry it between each cut. Each slice should have purple flowers visible throughout the butter and embedded in the outside.Serve straightaway or keep the sliced rounds chilled until needed.
Notes
- Best uses for chive blossom butter: Grilled white fish (sea bass, sole, halibut), boiled or roasted new potatoes, steamed asparagus, good crusty bread, or plain omelettes. The key is putting it on food where you can actually taste the butter melting, it's wasted in mashed potatoes or rice where the delicate flavour gets lost. You want that moment when warm food meets cold butter and it releases all that gentle onion sweetness.
- In the fridge, this keeps for about 2 weeks. The flowers will lose some of their vibrant purple colour over time, fading to a softer mauve, but they're still perfectly fine to eat.
- You can freeze it for up to 3 months. Slice it first, lay the rounds on parchment paper on a baking tray, freeze until solid, then transfer to a freezer bag. The flowers' colour fades more noticeably after freezing, but the taste remains.
- The key to longer storage is making absolutely certain your flowers were bone dry before mixing them in. Any moisture speeds up spoilage significantly.