Home preserving food successfully

Every French household I know has a cupboard full of preserved things: apricot jam from July, Ratatouille from August, Butternut squash jam from October, pickled cornichons and green beans from the garden. It isn’t precious or complicated, it’s simply what you do when summer gives you more fruit and vegetables than you can possibly eat in a week.
Home preserving food the French way means taking lovely produce at its peak, putting it in proper jars and processing it correctly, so you can open it in February and taste August! The method has barely changed in a century, because it simply works.
In this guide, I’ll walk you through everything you need to start preserving at home: the equipment, the water bath method step by step, which foods are safe to preserve this way (and which belong in the freezer instead), and how to avoid the mistakes that lead to jars that don’t seal or, worse, food that spoils which is a waste.
Table of Contents

What you need for home preserving food
The French keep it simple: proper jars, a big pot and a few basic tools, so there’s no need to overthink this part.
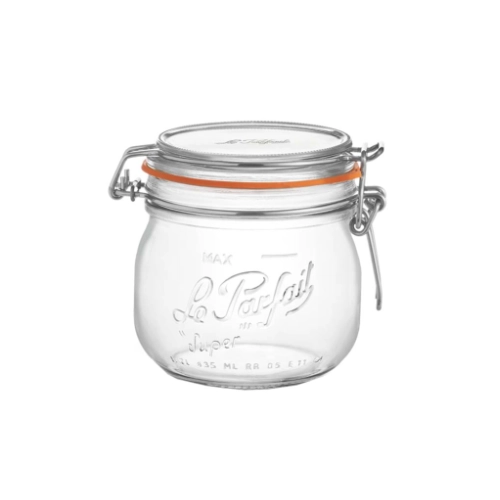
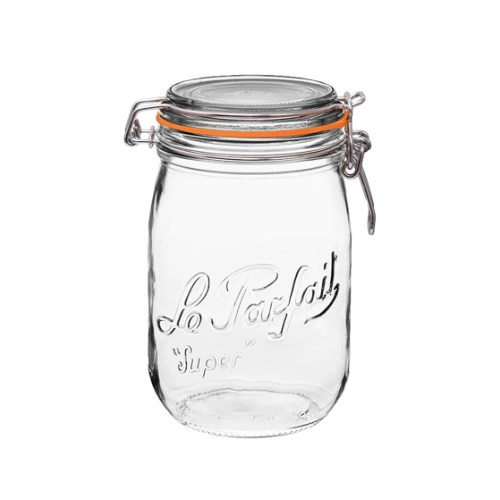
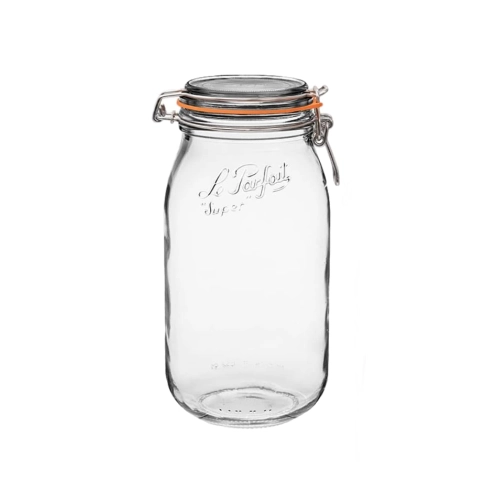
Le Parfait Jars: The French Standard
Le Parfait makes the jars French people actually use, and they’ve been doing it since the early 1930s. The ones you want for preserving are the Super jars, with glass lids, orange rubber seals and metal clips that hold everything together during processing.
They’re brilliant because the seal sits on top of the jar rather than being screwed on, so you can see straight away whether it has worked: if the lid lifts off, the jar didn’t seal, and there’s no guessing. The glass jars, lids and clips last for decades, but the rubber seals are single-use for preserving, so Le Parfait recommends a new seal every time you sterilise a jar. They’re inexpensive, so keep a bag of spares with your jars.
Le Parfait jars come in sizes from 350ml to 3 litres. For most preserving, you’ll want the 500ml (about a pint) and 1 litre jars, and six of each is a good start. Both use the same 85mm seals, which makes life easier.

A tall stock pot
You’ll also need a pot tall enough to cover your jars with at least 2 to 3cm of water, with room left for the water to boil properly. Height matters more than width here, because a wide, shallow pot won’t cover your jars.
I’ve had my De Buyer stock pot for eight years, and it still looks new. The Prim’Appety range has thick stainless steel that won’t warp, handles that stay cool and a base that heats evenly, and you’ll use it for stock, pasta and every big family meal, not just for preserving!
- De Buyer stock pot, 28cm: fits about six 500ml or 1 litre jars
- De Buyer stock pot, 24cm: fits about four 500ml or 1 litre jars
The other bits you’ll need
- A jar lifter: tongs designed to grip hot jars safely. Fishing boiling jars out with regular kitchen tongs is how jars get dropped.
- A wide-mouth funnel: it makes filling jars much easier, and keeps the jam in the jar rather than all over the counter.
- A ladle: for transferring hot food into jars. You probably have one already, but this one is a solid choice if not.
- A kitchen timer: processing times matter, so this one is non-negotiable (your phone works fine too).
- Clean tea towels: several of them, for wiping jar rims, setting hot jars on and handling hot lids.
- A canning rack or trivet: it keeps the jars off the bottom of the pot so they don’t crack and the water can circulate. The traditional French way is a folded tea towel, but a rack is safer and more stable.

Two preserving methods
In home canning, there are two ways of preserving food in jars, and which one you need depends on how acidic the food is.
Water bath canning
Water bath preserving means fully covering the jars in boiling water (100°C) for a set time. It’s for high-acid foods: fruit, jams and jellies, pickles in vinegar, chutneys, and tomatoes with added lemon juice. Acidity is what makes this method safe, because the bacteria that cause botulism can’t grow in it.
Pressure canning
Pressure canning uses a special pressure canner to reach around 116°C, which is the only safe way to preserve low-acid foods in jars: plain vegetables, beans, stock, soups and mixed vegetable dishes like ratatouille. A regular stock pot can’t reach that temperature, however long you boil it.
So start with the water bath. It covers most of what you’ll want to preserve, needs less equipment, and teaches you the fundamentals. This guide focuses on that method.
What you can (and can’t) preserve in a water bath
In home canning, there are two ways of preserving food in jars, and which one you need depends on how acidic the food is.
| Safe in a water bath | Freeze or pressure can instead |
|---|---|
| Fruit jams, jellies and compotes | Ratatouille and other cooked vegetable dishes |
| Fruit in syrup, such as peaches, apricots and cherries | Plain vegetables, such as green beans, carrots and courgettes |
| Pickles in vinegar, such as cornichons, pickled onions and pickled green beans | Vegetable stock and soups |
| Chutneys and relishes made to a tested recipe | Squash or pumpkin jam, butter or purée |
| Tomatoes, with lemon juice added to each jar | Beans and lentils |
For tomatoes, add 1 tablespoon of lemon juice to each 500ml jar (2 tablespoons for a litre). Tomatoes sit right on the borderline of acidity, and the lemon makes them safe without changing the taste much.
My ratatouille and my confiture de Sucrine (butternut squash jam) are both brilliant to make in big batches, but they’re low-acid, so freeze them in portions, or keep the squash jam in the fridge, rather than storing them in the cupboard.


A little bit of France in your inbox
Once a month, I’ll write to you with recipes, French cheeses, a few tips and little stories from the neighbourhood. And you’ll get my Mother Sauces e-book free, straight away!
How to preserve food in jars: the water bath method
Follow these steps exactly the first few times. Once you understand why each one matters, you’ll work faster, but don’t skip any.
1. Check and wash your jars
Check every jar for chips or cracks, especially around the rim, because a damaged rim won’t seal. Wash the jars and glass lids in hot, soapy water and rinse them well. If you’ll be processing for 10 minutes or more, which you will for most things, the water bath sterilises the jars at the same time, so there’s no need to sterilise them separately first.
2. Prepare the water bath
Put your rack or folded tea towel in the bottom of the pot, fill it with water, and heat it until it’s hot but not yet boiling, around 80°C. The jars and the water should be at a similar temperature when they go in, so they don’t crack.
3. Prepare your food
Whatever you’re preserving, jam, pickles or tomatoes, make it according to your recipe and have it hot and ready to go. Hot food goes into hot jars.
4. Fill Your Jars
Set a jar on a tea towel so it doesn’t slide, put the funnel in, and ladle in the hot food, leaving the right amount of space at the top (the headspace):
- Jams, jellies and chutneys: about 5mm (¼ inch)
- Fruit, tomatoes and pickles: about 1cm (½ inch)
Headspace matters. With too little, the food can bubble out during processing and stop the jar sealing, and with too much, you won’t get a proper vacuum. Slide a chopstick or a clean knife around the inside of the jar to release any air bubbles, and top up if you need to.
5. Prepare the seals and wipe the rim
Soak a new rubber seal in hot water for a few minutes to soften it. Then wipe the rim of the jar with a clean, damp cloth, because even a tiny bit of food on the rim can stop it sealing.
6. Close the jar
Fit the seal onto the glass lid, centre the lid on the jar and close the metal clip. For screw-band jars, put the flat lid on the rim and screw the band on until it’s just “fingertip tight”, snug but not forced, so air can escape during processing.
7. Process in the water bath
Use your jar lifter to lower the jars into the hot water, without letting them touch each other or the sides of the pot if you can help it. Add more hot water if you need to, so the jars are covered by at least 2 to 3cm. Put the lid on the pot and bring the water to a full rolling boil, with big bubbles breaking the surface, and start your timer only once it’s boiling properly.
Processing times depend on the food and the jar size, so always follow the time in your recipe. Keep the water at a steady rolling boil the whole time. If it stops boiling at any point, bring it back to a full boil and start the timer again from the beginning, as the official guidance recommends, because a jar that wasn’t held at boiling point for the full time may not be safe.
8. Remove and cool
When the timer goes off, turn off the heat, take the lid off the pot and leave the jars in the water for 5 to 10 minutes, which reduces the shock of the temperature change. Then lift them out with your jar lifter and set them on a folded tea towel, a few centimetres apart, away from draughts.
Leave them completely alone for 12 to 24 hours: don’t press the lids, move them or test the seals while they’re cooling.
9. Check the seals
After 12 to 24 hours, check each jar:
- Le Parfait jars: open the metal clip and try to lift the glass lid gently with your fingertips. If it’s sealed, the vacuum holds it firmly in place. If it lifts off easily, it didn’t seal.
- Screw-band jars: take off the band and press the centre of the lid. It shouldn’t move or flex.
Sealed jars can go in the cupboard. Any jar that didn’t seal goes in the fridge to be eaten within a week, or you can reprocess it within 24 hours with a new seal.
10. Label and store
Write the contents and the date on each jar, and store them in a cool, dark place. A cupboard works perfectly, as long as it isn’t above the cooker or in bright sunlight. Most preserves keep their best quality for about a year.

Two easy preserving recipes to start with
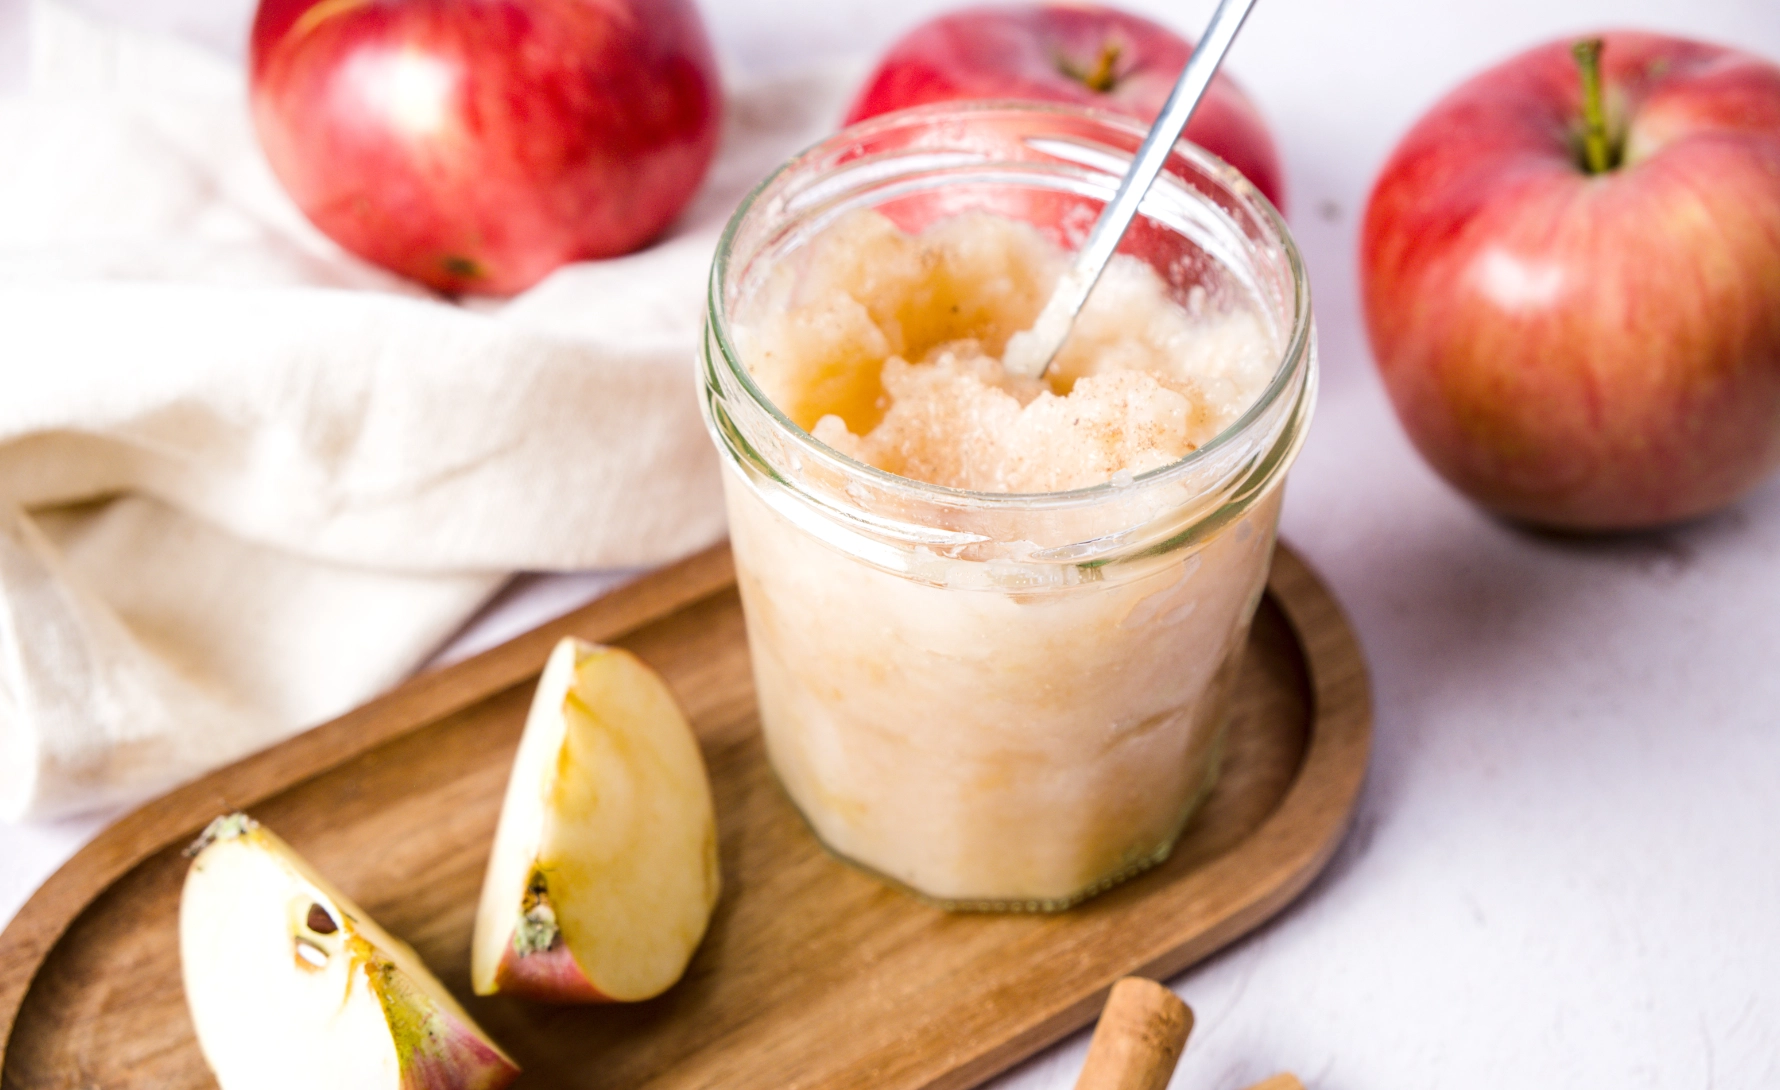
Apple compote in jars (for 500ml or 1 litre jars)
When my apple tree gives more apples than we can eat, this is where they go. Apples are naturally acidic, so apple compote is one of the easiest and safest things to preserve in a water bath, and a jar of it in winter is lovely with yogurt, crêpes or a slice of brioche. For the everyday version, see my apple compote recipe.
- Wash, peel and core about 2kg of apples, and cut them into chunks. If you’re working slowly, drop the pieces into a bowl of water with a squeeze of lemon juice so they don’t brown, then drain them.
- Put the apples in a large pan with 120ml (½ cup) of water and cook over a medium heat, stirring often so they don’t catch, until they’re completely soft. That takes 5 to 20 minutes, depending on the apples.
- Leave the compote chunky, or press it through a sieve or food mill for a smooth one.
- Sugar is optional. If you’d like it a little sweeter, stir in about 30g per litre of compote, then bring it back to the boil.
- Ladle the hot compote into hot, clean jars, leaving 1cm (½ inch) of headspace. Run a clean knife around the inside to release any air bubbles, then wipe the rims and close the jars with new seals.
- Process in a boiling water bath, timing from when the water returns to a full boil:
- 500ml jars: 15 minutes, or 20 minutes if you live 300 to 900m above sea level
- 1 litre jars: 20 minutes, or 25 minutes if you live 300 to 900m above sea level
About 2kg of apples fills roughly three to four 500ml jars, depending on the apples and how much you lose in peeling.

Pickled cucumbers (for a 1 litre jar)
This is the traditional French way of making cornichons in vinegar, and it doesn’t need a water bath, because the vinegar does the preserving.
- Choose 1kg of small, firm, freshly picked cucumbers. Trim them and gently rub off the fuzz with a rough cloth, without damaging the skin.
- Leave them to macerate for 24 hours with 250g of coarse salt.
- Discard the liquid the cucumbers have released and drain them well.
- Rinse them for 5 minutes in cold water with a few tablespoons of vinegar, then drain again.
- Pack the cucumbers into a Le Parfait jar with 12 peeled pearl onions, 3 bay leaves, a spoonful of coriander seeds and 6 sprigs of tarragon, or any spices you like, spread evenly through the jar.
- Cover completely with about 1 litre of white wine vinegar, close the jar and store it somewhere cool and dark.
Wait a month before opening, and once it’s open, keep the jar in the fridge.

Common mistakes (and how to avoid them)
Jars don’t seal
The usual causes are food left on the rim, the wrong headspace, a chipped rim, a reused rubber seal, or not enough processing time. If a jar doesn’t seal, put it in the fridge and eat it within a week, or reprocess it within 24 hours with a new seal.
Liquid boiling out during processing
It’s normal to lose a little liquid. If you lose more than 1 to 2cm, the jar was probably too full, the air bubbles weren’t released, or the jars went into water that was already boiling hard. Jars that lost some liquid are still safe as long as they sealed properly, so just use them first.
Jars that crack
This is almost always thermal shock: cold jars going into very hot water, hot jars set down on a cold counter, or jars sitting directly on the bottom of the pot. Use a rack, keep jars and water at similar temperatures, cool them on a tea towel, and check for hairline cracks before you start.
Seals that fail during storage
If a jar that was sealed comes open days or weeks later, something has gone wrong: the food may be fermenting, or the seal has failed. Don’t eat it. A broken seal means air, and possibly bacteria, has got in.

Storage and shelf life
Store sealed jars in a cool, dark cupboard. They don’t need refrigerating until they’re opened, and then they should go in the fridge.
- Jams and jellies: about 1 year for the best quality
- Fruit in syrup and tomatoes: about 1 year
- Pickles and chutneys: about 1 year (chutneys often get better with age)
Preserves are usually still safe after that if the seal is intact, but the colour, texture and flavour slowly fade. Once opened, keep jars in the fridge and use them within a few weeks.
Signs a jar has gone off
Throw a jar away, without tasting it, if you see any of these:
- A bulging lid or a broken seal
- Bubbles or foam rising inside the jar
- Mould, even a tiny spot
- An unpleasant smell when you open it
- Liquid spurting out when you open it
Home preserving food is safe when it’s done properly, but there’s no point taking chances with a jar that looks or smells wrong. If in doubt, throw it out.
FAQ
Is home preserving food safe?
Yes, home preserving food is safe when you match the method to the food. High-acid foods such as jams, fruit, pickles in vinegar and tomatoes with added lemon juice are safe in a boiling water bath. Low-acid foods such as plain vegetables, ratatouille, soups and stock need a pressure canner, or the freezer. Follow tested recipes and processing times, and use a new seal every time.
Can you reuse Le Parfait rubber seals?
No. The glass jars, lids and metal clips last for decades, but Le Parfait recommends a new rubber seal every time you sterilise a jar, because a used seal may not close properly a second time. The seals are inexpensive. For screw-band jars, the same rule applies to the flat lids, although the screw bands can be reused if they’re not rusty.
What’s the difference between water bath canning and pressure canning?
Water bath canning heats jars in boiling water at 100°C, which is safe for high-acid foods like jam, fruit and pickles. Pressure canning uses a sealed pressure canner to reach about 116°C, which is needed to destroy botulism spores in low-acid foods such as vegetables, beans, stock and soups. A regular pot can’t reach that temperature, however long you boil it.
Can I preserve jars in the oven?
No. Oven preserving isn’t safe: dry heat doesn’t heat the food in the jars evenly or reliably enough, and jars can crack or even shatter. Le Parfait rubber seals also aren’t designed for dry oven heat. Use a water bath for high-acid foods, and a pressure canner or the freezer for low-acid foods.
Can I make jam with less sugar?
Yes, but sugar helps jam set and keep, so lower-sugar jam has a softer set and a shorter life once opened. Use a recipe designed for less sugar, or a pectin made for low-sugar jams, and keep the processing time the same. Once opened, store low-sugar jam in the fridge and eat it within a couple of weeks.
Over to you
So you’ve got everything you need to start preserving at home the French way. Pick up some Le Parfait jars, find a tall pot, and choose a Saturday when you’ve got a few hours free.
Here’s what will probably happen the first time: you’ll overfill one jar, you’ll get jam on the counter despite the funnel, the kitchen will be very hot and slightly chaotic, and at least one jar won’t seal, so you’ll convince yourself you’ve done something catastrophically wrong (you haven’t, just put it in the fridge and eat it first). But then the other jars will seal with a satisfying little pop, you’ll line them up on the counter and feel absurdly proud of yourself, as you should!
Start with something easy, like a simple fruit jam or a jar of cornichons, rather than attempting twelve different preserves in one weekend, which is a recipe for madness and a kitchen that looks like a disaster zone. Once you’ve done it successfully, you’ll keep finding excuses to do it again. A friend has too many tomatoes, or there’s a great price on peaches at the market, and suddenly you’re planning your next batch.
What are you going to make first? Tell me in the comments how it goes, especially if something goes wonderfully wrong, because that’s usually how we learn best!
This post may contain affiliate links. If you buy through them I earn a small commission at no extra cost to you, and it helps keep this blog running. Please read my disclosure policy for more information. I am grateful for your support.