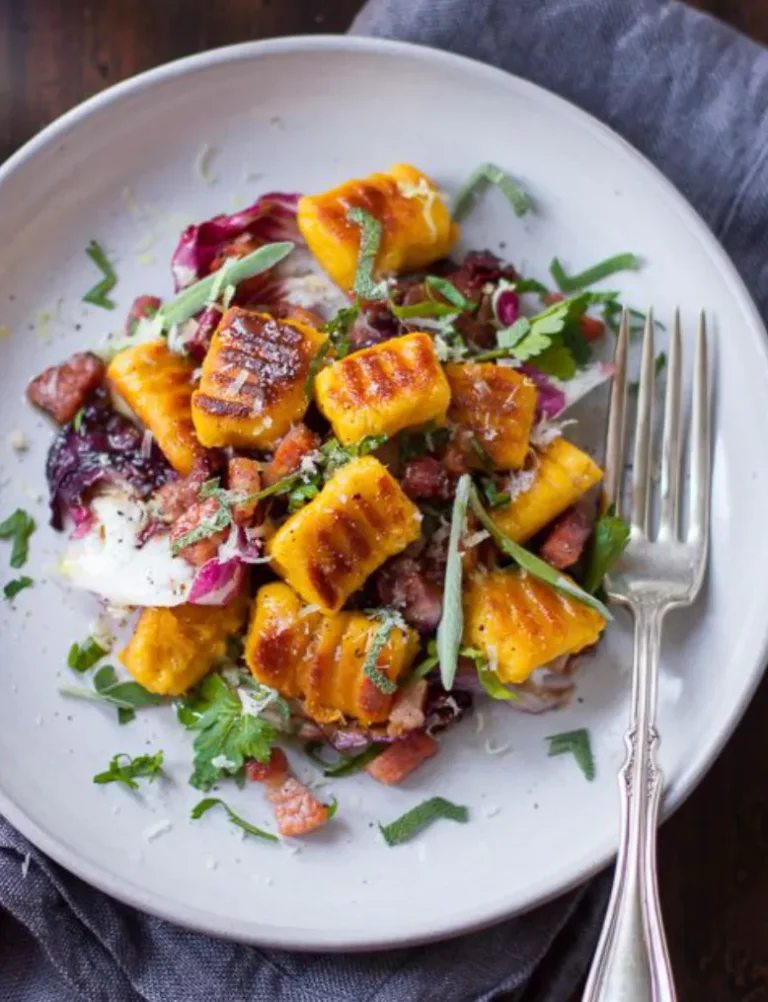
Pumpkin Gnocchi

 Prep Time 45 minutes
  Cook Time 45 minutes
  Total Time 1 hour 30 minutes
  Servings 4
Ingredients
For the Gnocchi
- 400 gr butternut squash or potimarron, unpeeled weight
- 300 gr floury potatoes Maris Piper or King Edward
- 1 egg
- 175 gr plain flour plus extra for dusting
- ½ tsp salt
- ¼ tsp nutmeg freshly grated
- 30 gr Parmesan cheese grated for the dough
For Serving
- 60 gr unsalted butter
- 12 leaves sage
- 100 gr vegetarian lardons or pancetta if not keeping it veggie
- 50 gr radicchio leaves
- parsley
- 40 gr Parmesan cheese for grating
- salt and black pepper
Equipment


Instructions
1. Roast the pumpkin
- Preheat your oven to 180°C (160°C fan). Cut the butternut squash in half, scoop out the seeds (save them for roasting if you're feeling virtuous), and place the halves cut-side up on a lined baking tray. Roast for 25–30 minutes until the flesh is completely tender when you poke it with a knife.This is the most important step. Roasting, not boiling, not steaming, concentrates the flavour and keeps the flesh dry. If your pumpkin is watery, you'll need tonnes of flour to compensate, and your gnocchi will end up rubbery. Once it's cooked, let it cool slightly, then scoop out the flesh and mash it until smooth. You want about 300g of flesh. Set aside to cool completely.
2. Cook the potatoes
- Whilst the pumpkin roasts, put the potatoes in a large pot of cold salted water. Bring to the boil and cook for 20–25 minutes until completely tender. The potatoes need to be really soft, no hard bits in the centre.Drain them well, then peel them whilst they're still hot (hold them with a tea towel if they're too hot to handle). Push the hot potatoes through a ricer into a large bowl. If you don't have a ricer, use a fine-mesh sieve and the back of a spoon. Don't use a food processor or you'll end up with glue.
3. Combine pumpkin and potato
- Add the mashed pumpkin to the riced potato. Weigh them, you want roughly 600g total (about 300g pumpkin, 300g potato). Add the salt, nutmeg, and 30g parmesan. Mix gently with a fork.Make a well in the centre, add the beaten egg, and mix until just combined. Don't overwork it.
4. Add the flour (carefully)
- Start with 150g flour. Sprinkle it over the mixture and fold it in gently with your hands or a pastry blender. The dough should come together but still feel slightly sticky. If it's too wet to handle, add more flour, a tablespoon at a time, until you can shape it. But be stingy with the flour, the less you add, the lighter your gnocchi.The dough should be soft, slightly tacky, but not sticking to your hands. When you can roll it into a log without it falling apart, you're done.
5. Shape the gnocchi
- Lightly flour your work surface. Divide the dough into 6 pieces. Roll each piece into a long rope about 1.5cm thick. Cut into 2cm pieces.If you want the classic ridges, roll each piece down the back of a fork with your thumb. Or leave them plain, they'll taste the same. As you shape them, place them on a floured tea towel in a single layer. Don't let them touch or they'll stick together.
6. Cook the gnocchi (in batches)
- Bring a large pot of salted water to a gentle simmer, not a rolling boil, just small bubbles breaking the surface. Working in batches of about 20, drop the gnocchi into the water. They'll sink, then float to the top after 1–2 minutes. Once they float, give them another 30 seconds, then scoop them out with a slotted spoon.Place them on a clean tea towel to drain whilst you cook the rest. Don't skip the batch cooking, too many at once and they'll stick together and cook unevenly.
7. Fry the lardons
- Whilst the gnocchi cook, heat a large frying pan over medium heat. Add the vegetarian lardons. Fry for 4–5 minutes until golden and crisp. Transfer to a plate and set aside.
8. Make the sage butter and finish the gnocchi
- In the same pan, melt the butter over medium heat. Add the sage leaves and let them sizzle for 30 seconds until crisp and fragrant. Don't let the butter burn, you want it golden, not brown.Add the cooked gnocchi to the pan in batches (don't crowd them). Fry for 2–3 minutes on each side until golden and crispy. You might need to do this in two batches depending on the size of your pan. Add a bit more butter if the pan looks dry.
9. Assemble and serve
- Toss the fried gnocchi with the crispy lardons and torn radicchio leaves. The heat from the gnocchi will wilt the radicchio slightly, which is exactly what you want. Divide between four warm plates.Scatter over the fresh parsley, grate over a generous amount of parmesan, and finish with a few twists of black pepper and a pinch of flaky salt. Eat immediately whilst they're still crispy!
Notes
- The amount of flour you need depends entirely on how dry your pumpkin and potato were. Start with less and add more if needed. Too much flour = dense, rubbery gnocchi.
- You can shape the gnocchi up to 4 hours ahead. Lay them on a floured tray, cover with a tea towel, and refrigerate. Or freeze them in a single layer on a tray, then transfer to a freezer bag once solid. Cook from frozen, just add an extra minute to the cooking time.
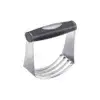
- Traditional gnocchi boards: If you’ve got one, brilliant. If not, a fork works perfectly well. The ridges help the sauce cling, but it’s not essential.
- Vegetarian lardons: Most supermarkets sell these now. If you can’t find them, use diced smoked tofu or just skip them and add more parmesan.
- Radicchio: This adds a lovely bitter contrast to the sweet pumpkin. If you can’t find radicchio, use rocket or baby spinach instead.
About this recipe
Pumpkin Gnocchi is not a French invention. It comes from Northern Italy, where potato dumplings have been made since the 16th century, after potatoes arrived from the Americas and the cooks of the Veneto and Lombardy worked out what to do with them. But the French regions that border Italy, Provence, the Alpes-Maritimes, the Savoie, absorbed the idea long ago, and by now pumpkin gnocchi appears on French bistro menus every autumn as naturally as any Provençal dish.
The French adaptation tends to be slightly richer and more considered about its accompaniments than the Italian original. Sage butter rather than a simple dressing. Bitter leaves for contrast. Something salty and crispy alongside. The logic is French even when the dish is technically Italian, and that combination is exactly what this recipe is built around.
Autumn in a French market is one of the great seasonal experiences, and nothing announces it quite like the arrival of potimarron. This small, dense, rust-coloured squash appears on market stalls from September onwards, piled up next to the walnuts and the first of the wild mushrooms. Its flesh is sweet and dense with a faint chestnut flavour, which is exactly where the name comes from: potiron for pumpkin, marron for chestnut. The French roast it for soups, layer it into gratins, and make it into pumpkin gnocchi. This recipe is the last of those, and it is the best thing to do with a potimarron when the weather turns.
Butternut squash works perfectly well too, incidentally. Slightly less sweet, slightly more watery, but the same principle applies and the result is just as good.
Why potato makes gnocchi and pumpkin recipe work
Pure pumpkin gnocchi, made with nothing but squash and flour, tends to be too soft and prone to collapsing. The water content in most squash varieties is high enough that without potato in the mix, you end up with something closer to a dumpling than a proper gnocchi. Adding potato gives the dough structure, produces that characteristic texture, and means the gnocchi holds together through boiling and pan-frying without falling apart.
The ratio matters. Too much potato and you lose the sweetness and colour that make pumpkin and gnocchi worth making over plain potato gnocchi. Too little and the dough is unstable. This recipe gets it right.

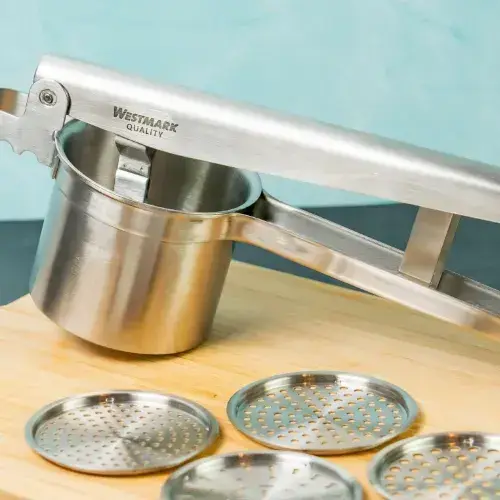
The potato ricer: the one piece of kit that makes the difference
The texture of gnocchi depends almost entirely on how the potato and pumpkin are incorporated. The moment you overwork the dough, the starch develops and the gnocchi becomes dense and chewy. The goal is the lightest possible dough with the minimum of handling.
A potato ricer is the correct tool for this, and there is no good substitute. It breaks the cooked potato and roasted pumpkin into fine, even strands without compressing or overworking them, which is exactly what you cannot achieve with a masher or a fork. I use the Westmark potato ricer, which handles both the potato and the roasted potimarron cleanly and consistently. The result is a dough that comes together in seconds and produces gnocchi with exactly the soft, pillowy interior the recipe needs. If you make gnocchi even occasionally it is worth having one. The difference in texture is not subtle.
Pan-frying: the step most people skip
Boiling the gnocchi is not the end of the process. It is the middle. Pan-frying the gnocchi pumpkin recipe after boiling is what separates a decent result from a genuinely restaurant-quality dish. Boiled gnocchi is fine. Boiled then pan-fried gnocchi in brown butter develops a crisp golden crust on the outside while staying soft inside, which is an entirely different thing to eat and considerably better.
Most home cooks skip this step because it adds time and another pan. It is a shame because it takes about three minutes and is the difference between gnocchi that is pleasant and gnocchi that people ask you about.
Share your feedback and spread the love!
If you try this recipe, I’d love to hear how it turns out! Leave a ★★★★★ rating and your thoughts in the comments, it helps fellow French foodies discover this recipe too. Snap a photo and tag me @obviously.french on Instagram if you’re sharing your bake or cooking online. Don’t forget to save this recipe to Pinterest so you’ll always have it handy for your next French-inspired meal!
Disclosure: Just so you know, this post contains sponsored content and/or affiliate links, If you make a purchase through these links, I may receive a small commission. Doesn’t cost you anything extra. I only link to things that are actually worth your time. All opinions are my own!