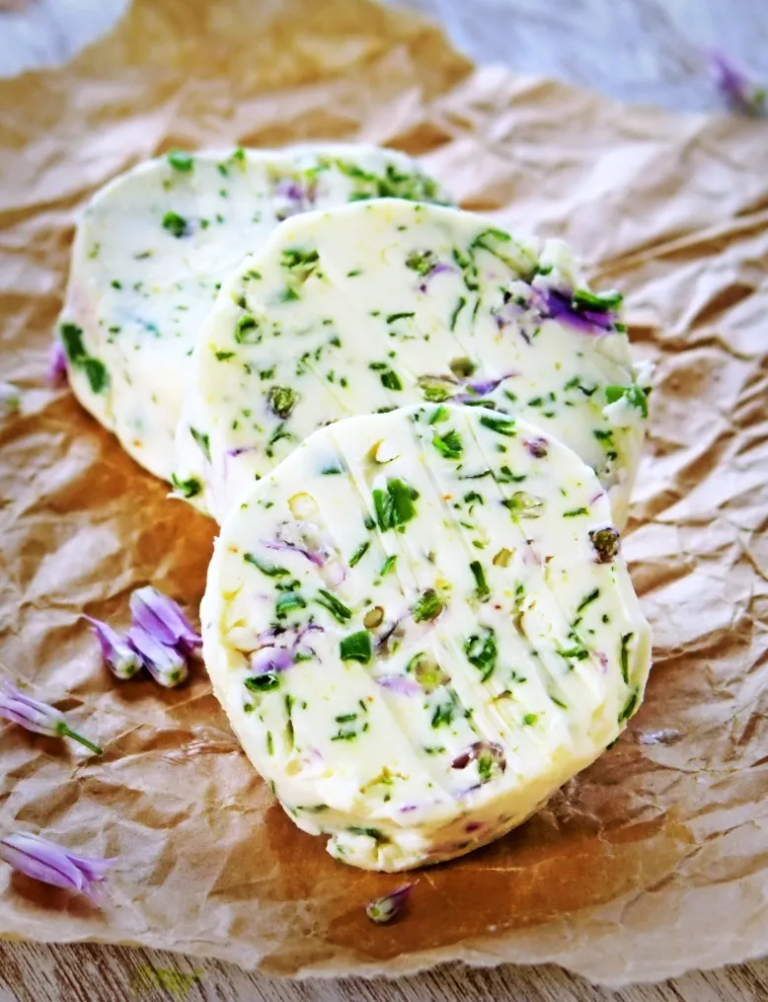
Chive Blossom Butter

 Prep Time 15 minutes
  Total Time 2 hours 45 minutes
  Servings 8 serving
Ingredients
- 15 g chive flowers washed and dried
- 115 gr salted butter
- 2 tbsp chives
- salt and black pepper
Equipment

Instructions
1. Prep the chive flowers
- Wash the chive flowers thoroughly but gently under cold water. They're delicate. Pat them completely dry with a clean tea towel. Any moisture left on them will make your butter weep and shorten its shelf life.Once dry, separate about 5 flowers and set them aside. These are for decoration. Pull the petals off the remaining flowers, you want individual petals, not whole blooms for mixing into the butter. Discard the green stems and any bits that look past their best.
2. Soften the butter
- Your butter needs to be nice and soft, room temperature, easily spreadable, but not melting. Take it out of the fridge about an hour before you start. If you've forgotten, cut it into small cubes and it'll soften faster.Don't microwave it. Melted butter doesn't work for this. You need it soft enough to mix but still holding its shape.
3. Mix the butter
- Put the softened butter in your bowl. Add the chive flower petals (not the whole flowers you set aside) and the chopped chives. Add a good grinding of black pepper. Mix everything thoroughly with a fork or wooden spoon until the petals and chives are evenly distributed throughout the butter.The butter can turn slightly purple-pink from the flower petals. This is normal and looks brilliant once it's done.
4. Shape the log
- Lay out a piece of cling film on your work surface. Dampen the surface slightly first, it helps keep the cling film in place whilst you're working.Spoon all the butter mixture onto the cling film, forming a rough line down the centre. Leave a border of about 2cm on each side. Now fold the cling film over the butter and start rolling it into a log shape, about 2.5cm (1 inch) in diameter.Roll it tightly and twist the ends like a Christmas cracker to seal. The tighter you roll, the neater your slices will be later.
5. Chill until firm
- Pop the butter log in the fridge for 2 hours minimum, or until it's completely firm. You need it solid for the next step, if you want to decorate it.Or, you can use your butter straightaway as it is!
6. Apply the decorative flowers
- This is the bit that makes it look properly impressive. Take the butter log out of the fridge and unwrap the cling film. Let it sit at room temperature for 2 minutes, you want it slightly softened on the outside but still firm inside.Take your reserved whole chive flowers and break each one into 2-3 sections. Press these flower sections gently but firmly into the outside of the butter log, distributing them evenly around the surface. They should stick to the slightly softened butter.Once you've applied all the flowers, rewrap the log in fresh cling film and roll it gently to help the flowers adhere properly. Back in the fridge for another 30 minutes to firm up completely.
7. Slice and serve
- When you're ready to serve, unwrap the butter and use a sharp knife to cut it into rounds. For clean slices, run the knife under hot water and dry it between each cut. Each slice should have purple flowers visible throughout the butter and embedded in the outside.Serve straightaway or keep the sliced rounds chilled until needed.
Notes
- Best uses for chive blossom butter: Grilled white fish (sea bass, sole, halibut), boiled or roasted new potatoes, steamed asparagus, good crusty bread, or plain omelettes. The key is putting it on food where you can actually taste the butter melting, it’s wasted in mashed potatoes or rice where the delicate flavour gets lost. You want that moment when warm food meets cold butter and it releases all that gentle onion sweetness.
- In the fridge, this keeps for about 2 weeks. The flowers will lose some of their vibrant purple colour over time, fading to a softer mauve, but they’re still perfectly fine to eat.
- You can freeze it for up to 3 months. Slice it first, lay the rounds on parchment paper on a baking tray, freeze until solid, then transfer to a freezer bag. The flowers’ colour fades more noticeably after freezing, but the taste remains.
- The key to longer storage is making absolutely certain your flowers were bone dry before mixing them in. Any moisture speeds up spoilage significantly.

About this recipe
This chive blossom butter is one of those recipes that looks far more impressive than the effort involved. Four ingredients, fifteen minutes of actual work, and you end up with something genuinely beautiful on the table.
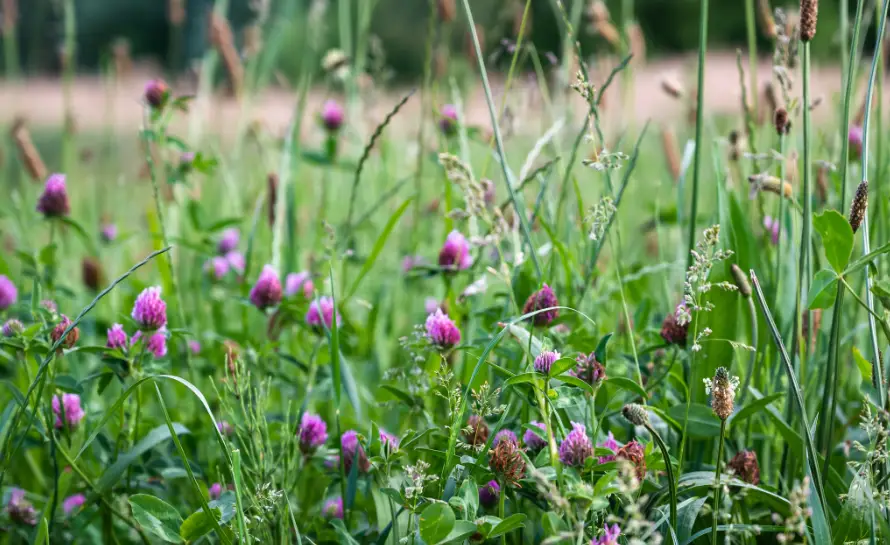
If you’ve grown chives in the garden, you already know the moment in late spring when those purple globe flowers appear. Most people cut them off to keep the plant productive. Cut them, but don’t throw them away. Those blossoms are edible, mildly oniony, and they turn a simple compound butter into something that looks chique and taste delicious.

What is chive blossom butter?
Chive blossom butter is a compound butter, basically butter mixed with aromatics and shaped into a log. This version uses both the chive flowers and the green chive stems, which gives you two layers of flavour: the subtle floral sweetness of the blossoms and the sharper, more familiar chive taste. The petals also tint the butter a soft purple-pink as you mix, which makes every slice genuinely pretty.
It belongs to a long French tradition of “beurres composés” or “composed butters”, flavoured butters used to finish dishes rather than cook in them. Think of it as the easiest way to elevate a piece of simply grilled fish or a bowl of new potatoes without actually doing much cooking at all.
When to make it
This is a true spring butter recipe. Chive blossoms appear from around April through June depending on your climate, and that’s your window. You can use just chives the rest of the year and it’s still a very good butter with chives, but the flowers are what make it special. If you grow your own chives, you’ll have plenty. If not, check farmers’ markets in late spring, or ask a neighbour with a garden.
What to serve it with
The best uses are ones where you can actually taste the butter melting. Grilled white fish is the classic pairing, sea bass, sea bream, sole, or halibut, where a cold slice placed on top melts into the fish as you bring it to the table. Steamed or baked asparagus is another natural match, especially early in the season when both are at their peak at the same time.
Boiled or roasted new potatoes work brilliantly. So does good crusty bread, where the butter is the whole point. For a simple but impressive starter, bring the whole butter log to the table on a wooden board alongside a good baguette. A plain omelette, finished with a slice melting over the top just before serving, is one of those simple things that tastes disproportionately good.
If you’re serving the butter at the table rather than using it to finish a dish, a Le Creuset butter dish keeps it at the perfect spreadable temperature without letting it go greasy. It’s one of those things you use every single day once you have it.
Tips for the best chive butter recipe
The most important step is drying your flowers completely before mixing. Any moisture will shorten the shelf life and can make the butter weep in the fridge. Pat them dry thoroughly and leave them on a clean tea towel for a few minutes if you’re not confident they’re dry enough.
Use salted butter. It balances the floral sweetness of the blossoms and you won’t need to add much extra salt.
Roll the log tightly in cling film. The tighter the roll, the cleaner and more even your slices will be. Twist the ends firmly and chill for the full two hours before decorating.
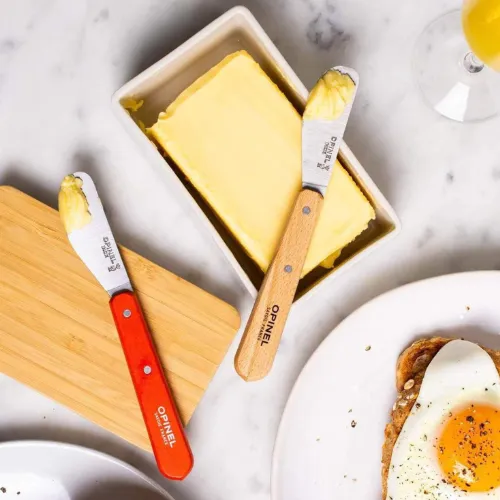
When it comes to serving, a good butter knife makes a real difference, not just aesthetically but practically. The Opinel butter knife is the one I reach for. The curved blade spreads beautifully without tearing bread, and it looks lovely on the table next to a decorated butter log. It’s also the kind of thing that prompts questions from guests, which is always a good sign.
Share your feedback and spread the love!
If you try this recipe, I’d love to hear how it turns out! Leave a ★★★★★ rating and your thoughts in the comments, it helps fellow French foodies discover this recipe too. Snap a photo and tag me @obviously.french on Instagram if you’re sharing your bake or cooking online. Don’t forget to save this recipe to Pinterest so you’ll always have it handy for your next French-inspired meal!
Disclosure: Just so you know, this post contains sponsored content and/or affiliate links, If you make a purchase through these links, I may receive a small commission. Doesn’t cost you anything extra. I only link to things that are actually worth your time. All opinions are my own!