Disclosure: This post may contain affiliate links which provide us a small commission when used for purchase. Please read my disclosure policy for more information. I am grateful for your support!


About this recipe
If you love baking tarts like I do, this sweet shortcrust pastry belongs in your arsenal. I use it for the pear frangipane tart and for most of the fruit tarts I make all summer. I reduce the sugar a bit as most of the time, the fillings are already sweet so there’s no need to add too much in the crust, but feel free to use more if your filling is light of course. I wrote down for you the standalone recipe, so you can come back to it whenever your tart needs a shell!
What is a sweet shortcrust pastry
The name comes from “sable,” the French word for sand, and it describes exactly what the dough looks like at one stage of making it. True pâte sablée is made using the sablage technique, rubbing cold butter into flour with your fingertips until you get a fine, sandy texture, almost like breadcrumbs. It’s where this sweet pastry gets both its name and its characteristic crumbly texture.
This matters because plenty of recipes online use a different method called crémage, where you cream the butter and sugar together first before adding the flour. The two methods get used interchangeably in everyday French baking, which causes real confusion. Technically, the crémage method belongs to a different pastry called pâte sucrée. If you want a genuinely sablée crust, the sandy stage with cold butter is what gets you there.
All the French pastry doughs are listed here if you need to know which one to use for what.
Why English doesn’t have a proper translation
People often call this sweet shortcrust pastry, but that’s not quite right. Shortcrust is really the English equivalent of pâte brisée, which is a different, less buttery, less sweet pastry used for savoury pies and quiches. Pâte sablée is richer, sweeter, and more delicate. English simply doesn’t have a word for it, which is why I keep the French name on the blog behind the closest name I could think of which is sweet shortcrust pastry. Others also call is sweet crust pastry.
The cold butter
The temperature of the butter changes everything about this sweet crust pastry. Cold butter, cut into small cubes and rubbed quickly into the flour, coats each flour particle in a thin layer of fat before any liquid is added. That fat barrier is what stops the flour from developing too much gluten later, which is exactly what keeps the finished pastry crumbly rather than tough and chewy.
If your kitchen is warm or your hands run hot, work fast and don’t be afraid to pop the bowl in the fridge for ten minutes partway through if the butter starts to soften. A warm, greasy sablage will never give you the same texture as a properly cold one.
The fraisage
This is a typical French pastry technique. Once your dough has come together, you push it away from you across the work surface using the heel of your hand, in one or two short, firm strokes. It looks almost too simple to matter, but it finishes blending the butter and flour completely without overworking the dough the way more mixing would.
If you skip it, your pastry can end up slightly uneven, with small pockets of butter that melt unevenly in the oven. Do it properly and the texture comes out completely consistent every single time. It takes about ten seconds and it’s worth doing exactly as described.
What can you make with this sweet shortcrust pastry
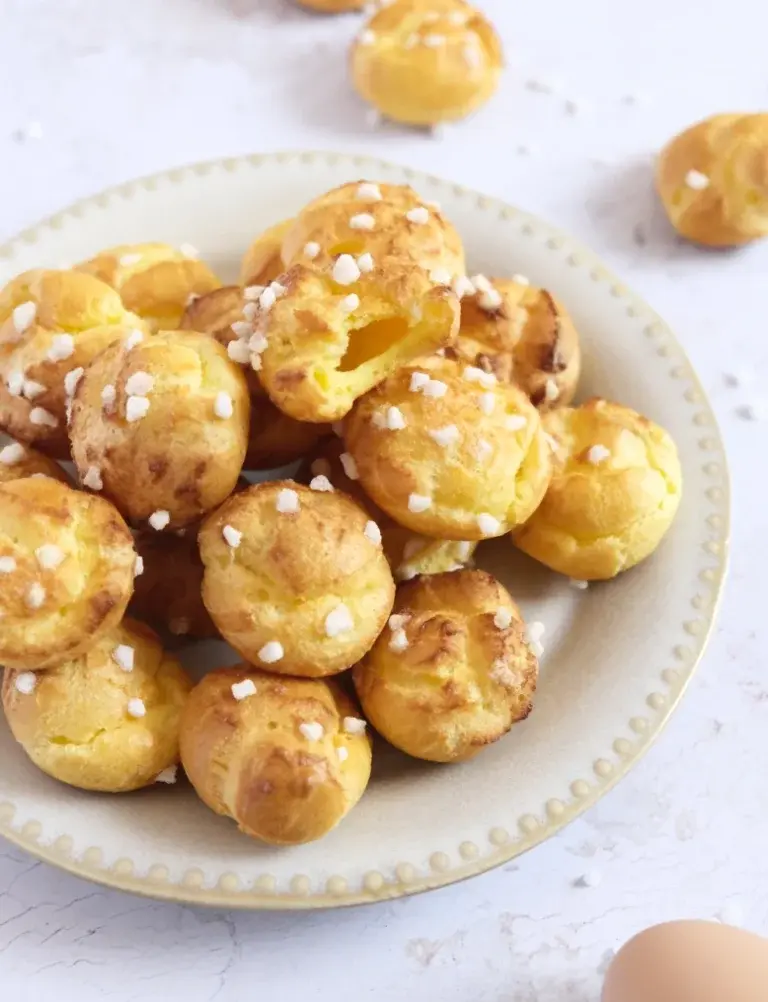
This recipe for sweet crust pastry is the base for almost every sweet tart in French pâtisserie. Fruit tarts of every kind, tarte bourdaloue, lemon tart, chocolate tarts, the berry tartlets with mascarpone and coconut cream on this blog. It also works beautifully for sablé biscuits if you skip the rolling and lining altogether and simply cut the dough into shapes before baking. One sweet short crust recipe, a huge number of possibilities!
Tart Rings
Use the sweet shortcrust pastry with 8cm tart rings to make little tartlets, or a perforated fluted tart ring which is a bit higher (3cm) for bigger fruit tarts and other fillings. Both work fantastic with the baking airmat. You won’t be disappointed with the professional results.
 Prep Time 15 minutes
  Cook Time 20 minutes
  Total Time 1 hour 55 minutes
  Servings 1
Description
Ingredients
- 250 gr plain flour sifted
- 150 gr unsalted butter room temperature
- 80 gr icing sugar sifted
- 50 gr egg room temperature
- 1 pinch salt
Equipment

Instructions
1. Make the sablage
- Put the sifted flour, icing sugar and salt in a large bowl. Add the cold butter cubes. Using your fingertips, rub the butter quickly and lightly into the flour until the mixture resembles fine breadcrumbs with a sandy, powdery texture and no visible butter lumps. This is the sablage, the step that gives the pastry its name. Work quickly so the butter stays cold.
2. Add the egg and bring together
- Make a well in the centre of the sandy mixture. Add the egg and mix briefly with a fork or your fingertips until the dough just comes together into a ball. Do not overwork it, stop the moment no dry flour is visible.
3. Fraisage and chill
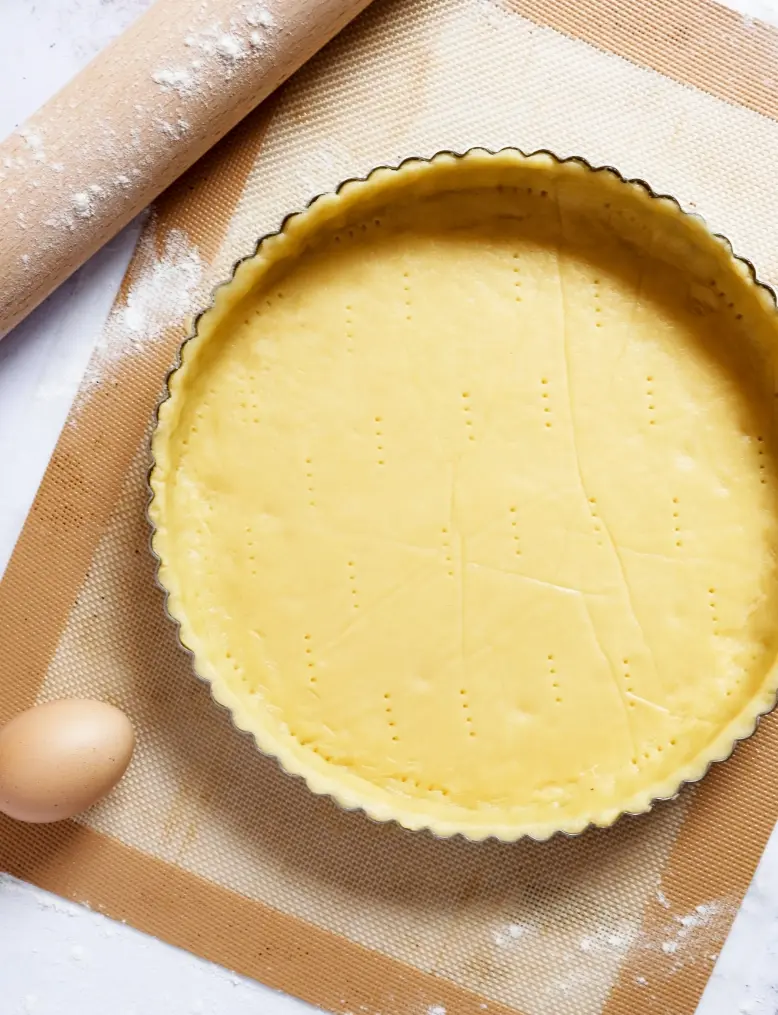
- Tip the dough onto a lightly floured surface. Using the palm of your hand, push the dough away from you in one or two short, firm strokes (the fraisage). This makes the dough homogeneous without overworking it. Gather back into a ball, flatten into a thick disc, wrap in clingfilm and refrigerate for at least 60 minutes .
4. Roll and line
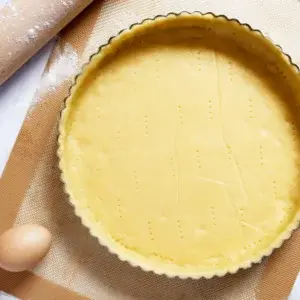
- On a lightly floured surface, roll the dough out to 3mm thickness. Work quickly, if the dough becomes soft or sticky, return it to the fridge for 20 minutes . Line your 24cm tart ring or 8cm tartlet rings, pressing the dough gently against the base and sides. Trim the excess flush with the rim. Prick the base all over with a fork. Freeze for 20 minutes.
5. Blind bake
- Preheat the oven to 165°C fan / 185°C conventional. Place the frozen tart on a perforated baking sheet. Bake for 18 to 20 minutes for a full tart, or 15 minutes for tartlets, until deep golden and completely dry to the touch. Cool in the ring before unmoulding.
Notes
- Yield: One 24cm tart or 8 individual tartlets (8cm)
- Cold butter for the sablage. Unlike the crémage method, sablage uses cold butter. The cold butter coats the flour particles in fat before the liquid goes in, which is what gives the pastry its characteristic crumbly, sandy texture. Don’t let it soften.
- Work quickly with your fingertips. The heat from your hands can melt the butter. Rub fast and lightly, you want a fine sandy texture with no visible lumps of butter. If the butter starts to soften, pop the bowl in the fridge for 10 minutes before continuing.
- Stop as soon as it comes together. Once the egg goes in, mix only until the dough just forms a ball. Overworking at this stage develops the gluten and makes the pastry tough and prone to shrinking in the oven.
- The fraisage step. Once the dough comes together, push it away from you on the work surface with the palm of your hand in one or two short firm strokes. This makes the dough homogeneous without overworking it. Small step, noticeable difference.
- Icing sugar, not caster sugar. Icing sugar incorporates more smoothly into the sandy mixture and gives a finer, more delicate result. Caster sugar can cause the dough to weep in the fridge.
- Freeze before baking. Once lined, freeze the tart ring or tartlet tins for 20 minutes before baking. This eliminates the need for baking beans and keeps the sides perfectly upright.
- Make ahead. The dough keeps in the fridge for 3 days wrapped in clingfilm, or in the freezer for up to a month. Baked shells also freeze well, cool completely, freeze on a tray, then transfer to a bag.
- Blind baking. Bake at 165°C fan / 185°C conventional for 18 to 20 minutes for a full tart, or 15 minutes for individual tartlets, until deep golden and completely dry. A pale shell will go soggy once filled.
Share your feedback and spread the love!
If you try this recipe, I’d love to hear how it turns out! Leave a ★★★★★ rating and your thoughts in the comments, it helps fellow French foodies discover this recipe too. Snap a photo and tag @obviously.french on Instagram. Come talk about it in our Facebook group. And don’t forget to save this recipe to Pinterest so you’ll always have it handy for your next French-inspired meal!