 May 10, 2026
Disclosure: This post may contain affiliate links which provide us a small commission when used for purchase. Please read my disclosure policy for more information. I am grateful for your support!
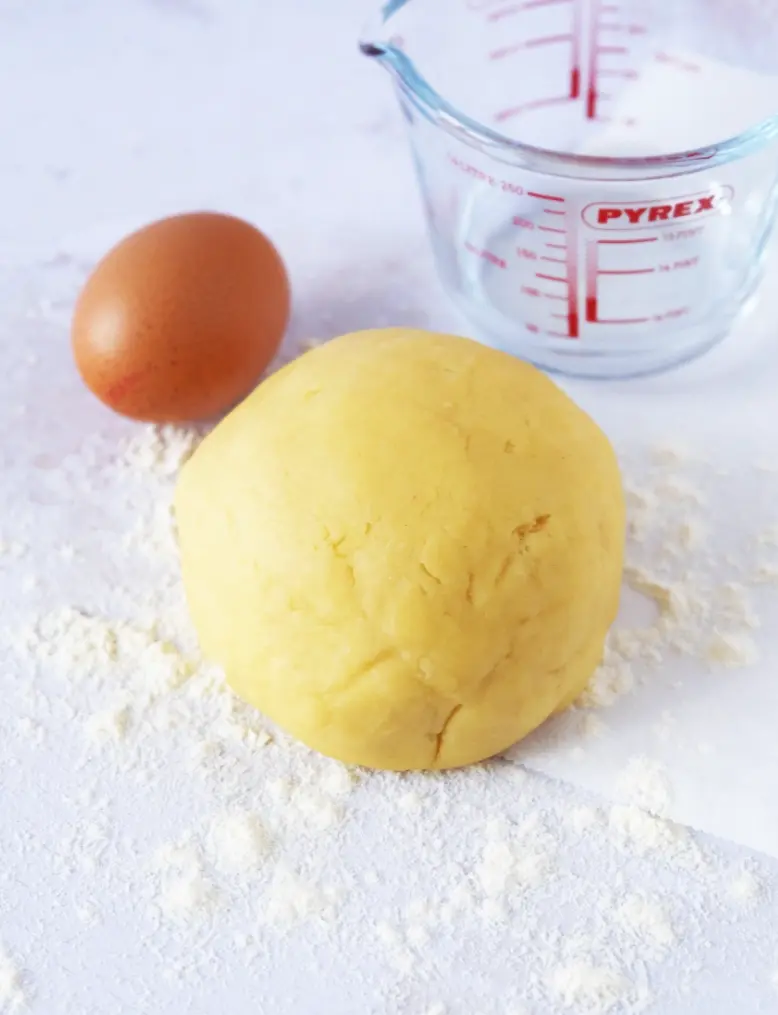
I learned this shortcrust pastry from my neighbour Nathalie, and once you’ve made it yourself, there’s really no going back to shop-bought. The flavour is just so much richer, buttery, clean, and full of that homemade goodness you can really taste.
Once you get the knack of it, it becomes second nature. The best part is that you can make a batch of multiple pastries, use one and freeze the rest. When you have a quiche Lorraine or mini salmon quiches to make, you just pull it out and use it!
In my opnion, shortcrust pastry or in French pâte brisée is the one to learn first, before any of the others French pastry doughs. Get this and you’ve got the base for half of French baking!
Table of Contents
Where shortcrust pastry comes from
Pâte brisée is the basic French shortcrust pastry: flour, butter, a little water, a pinch of salt. No sugar, which is exactly why it works for both sweet and savoury. Quiches, tarts, tartlets, tourtes are all made from this crust pastry.
It belongs to the pâtes sèches, the “dry” doughs with barely any liquid. They bake up golden and firm rather than soft. The whole game is keeping gluten low. In bread, gluten gives you that lovely chew. In shortcrust, it just makes the pastry shrink and toughen. So we use cold butter, handle it lightly, and give it plenty of time in the fridge.
Ingredients
- Plain flour – The structure. Sift it first so it takes up the butter evenly and you’re not left with lumps.
- Cold butter – Straight from the fridge, cut into small cubes. Temperature is everything here, because cold butter is what keeps the pastry crumbly instead of greasy. Don’t let it soften.
- Water – Ice-cold, and just enough to bring it together. Too much and you develop gluten, which is the one thing you’re trying to avoid.
- Egg yolk (optional) – Not traditional, but it enriches the dough and gives a cleaner slice. It also helps seal the base against wet fillings. Swap it for a splash more water if you’d rather leave it out.
- Salt – Just a pinch, but it stops the whole thing tasting of nothing.
How to make basic shortcrust pastry
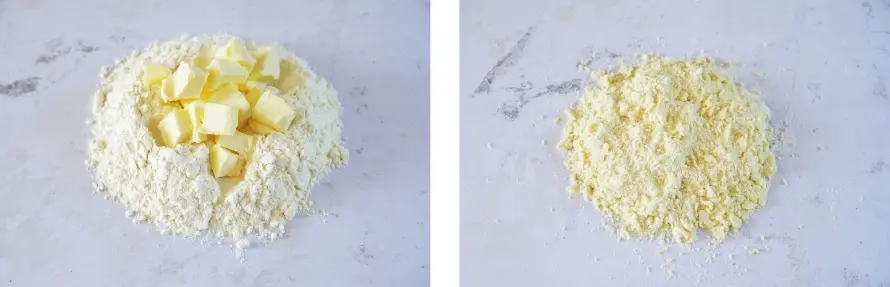
1. Sable the butter into the flour
Sift the flour onto your surface or into a bowl, add the cold cubed butter, and rub it in with your fingertips. Lift and let it fall, pinching the cubes into the flour as you go, until there are no visible lumps of butter left and the whole lot looks like coarse, damp sand. Fingertips only. If it starts to look greasy or smeary rather than sandy, your butter’s warming up, so pop it in the fridge for ten minutes before carrying on. This is what stops the gluten forming later, so don’t rush to the next stage until it genuinely looks like sand.
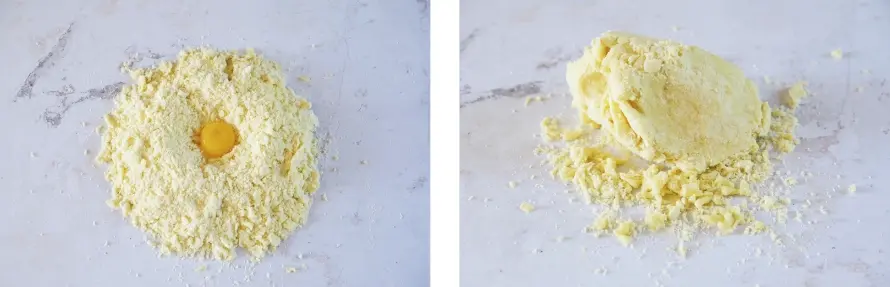
2. Add the yolk and water
Make a well in the sandy mixture and add the egg yolk (if using) and the cold water. Bring it together with your fingers or a knife just until it starts to clump into a rough, shaggy dough. Don’t knead it and don’t try to make it smooth yet. It’ll look messy and a bit dry, with crumbly bits around the edge, and that’s exactly right. The more you work it now, the tougher it gets.
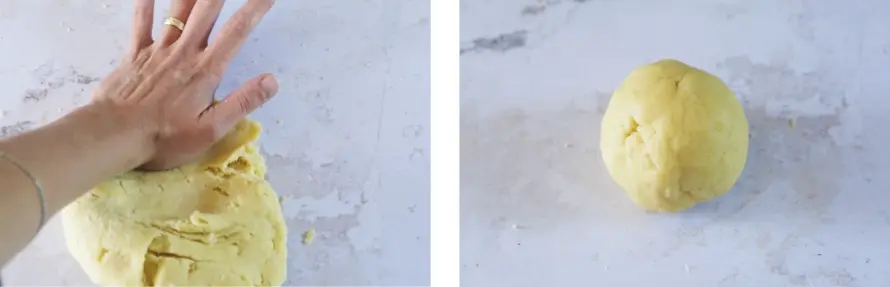
3. Fraisage
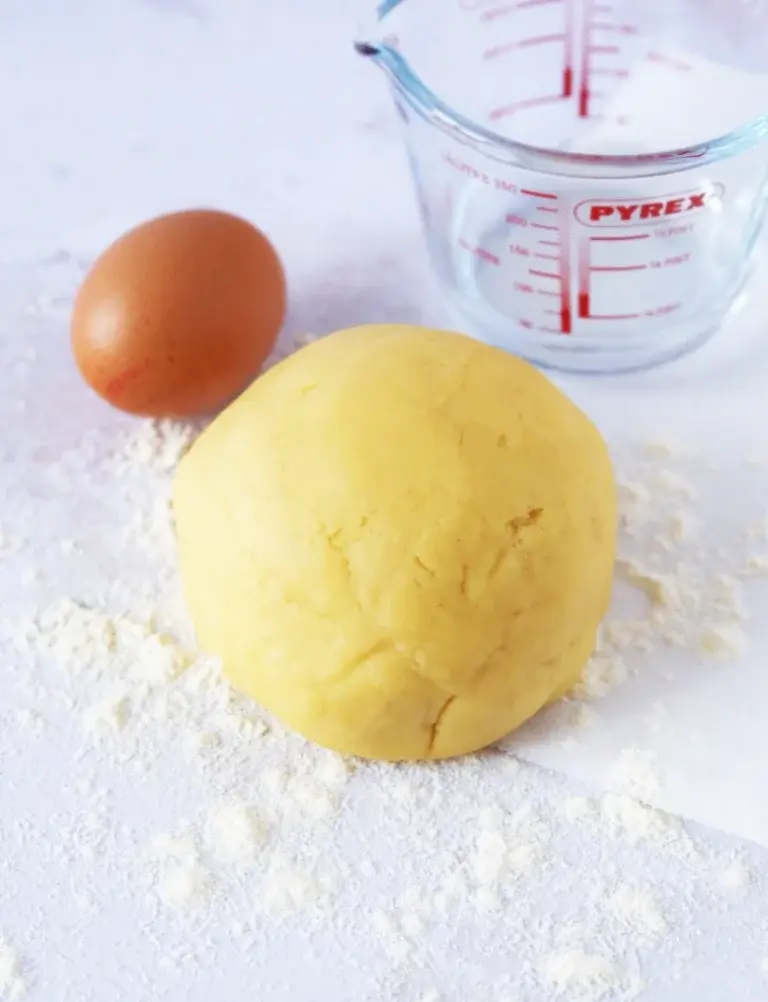
Tip it all onto the surface, crumbly bits and all, and push small amounts away from you with the heel of your hand, smearing the dough flat. Gather it back and do it once more. You’ll feel it change from a loose, cracked mess into a smooth dough that holds together in one piece. That’s the butter distributing. Stop as soon as it comes together, though, because this isn’t kneading and you don’t want to overdo it.
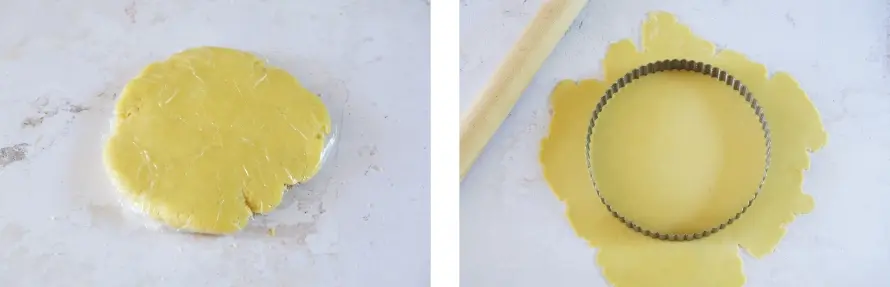
4. Shape and rest
Press the dough into a flat disc, not a ball, because a disc rolls out far more evenly and with fewer cracks. Wrap it and chill for an hour. Then roll it out on a lightly floured surface, line your tin, and give it a second rest of 30 to 60 minutes before baking.
Rest time
The first hour in the fridge, after mixing, chills the butter back down and relaxes any gluten you’ve developed, so the pastry rolls out without fighting you and won’t be tough.
The second rest comes after you’ve rolled and lined the tin. Another 30 to 60 minutes in the fridge sets the shaped pastry so the sides don’t slump down into the tart ting as it bakes. Miss either one and you’ll see it: shrunken edges, a tough crumb, or both. It’s mostly waiting rather than work, so it’s an easy win!
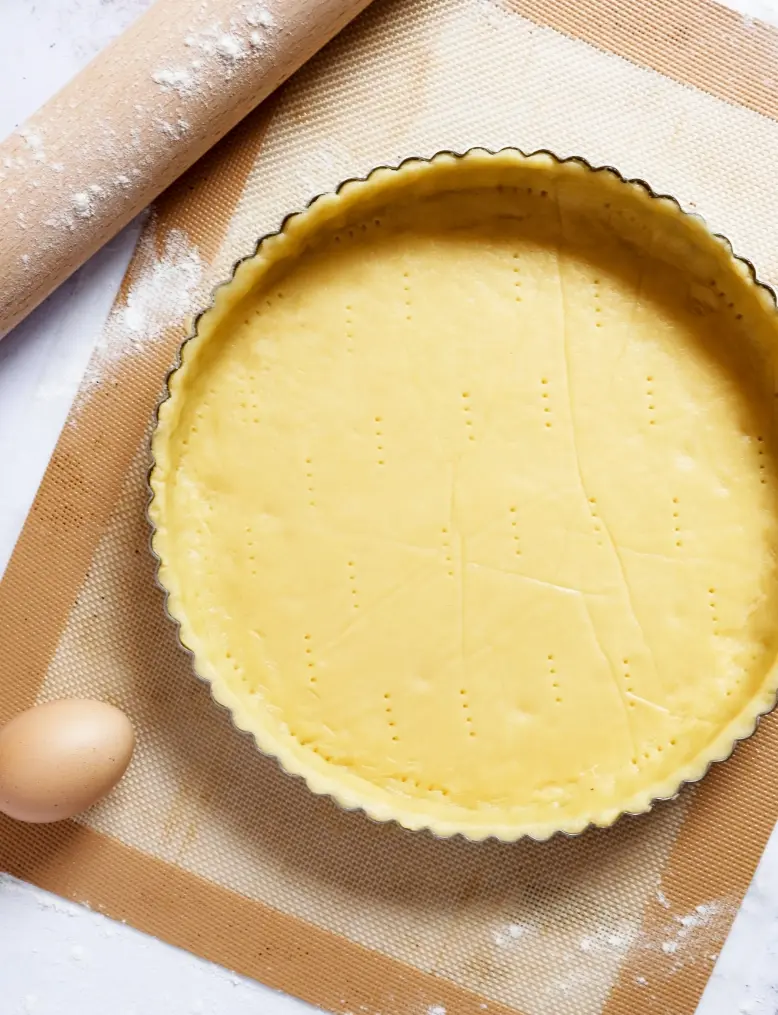
5. Line your tart ring(s)
Use the shortcrust pastry with 8cm tart rings to make little tartlets, or a perforated fluted tart ring which is a bit higher (3cm) for quiche and other fillings. Both work fantastic with the baking airmat. You won’t be disappointed with the professional results.
Tools for this recipe
Check out my favorite kitchen essentials and cookware!
- Use a rolling pin to effortlessly flatten the dough
- I use my trusty, affordable fluted tart ring to make tarts with the short crust
- And I use my smaller 8cm tart rings to make mini tartlets
Tips for success
- Keep everything cold: cold butter, cold water, cold hands if you can manage it. The second the butter starts to feel greasy, stop and chill the lot. This is the single biggest thing between crisp and tough.
- Don’t add all the water at once as flours vary in how much they drink up. Add most of it, bring the dough together, and only add the last splash if it won’t come together.
- Roll from a disc, not a ball: a flat disc rolls out evenly and cracks far less at the edges. A ball fights you the whole way.
- Don’t skip either rest: one hour after mixing, 30 to 60 minutes after lining. This is what stops the sides slumping and the crust toughening.
How to store it
- The raw dough keeps brilliantly, which is why it’s great to make your own. If you wrap it tightly, it’ll sit in the fridge for up to three days.
- It also freezes well for up to a month. Wrap the disc tightly and thaw it overnight in the fridge before rolling. You can also freeze it already rolled and lined in the tin, ready to bake more or less from frozen.
- A blind-baked, unfilled shell keeps a couple of days in an airtight tin. Fill it as close to serving as you can, especially with anything wet, so the base stays crisp.
More recipes to try
Variations
- I always add an egg yolk for extra richness. The version with a yolk slices more cleanly and seals better against wet fillings which is brilliant for quiches.
- Make it sweet-ish: a spoonful of sugar in the flour tips it towards a pâte brisée, good for fruit tarts where you still want the sturdiness of the shortcrust pastry rather than a fragile sweet crust.
- Add herbs for your savoury tarts: a little chopped thyme or a scrape of parmesan rubbed into the flour makes a lovely base for a savoury tart or quiche, and the crust looks more interesting too!
- If you want to make it more healthy, replace a quarter of the flour with wholemeal flour for a nuttier, more rustic crust. It’ll be a touch more fragile, so handle it gently.
FAQ
What’s the difference between pâte brisée and shortcrust pastry?
They’re the same thing in a different language. Pâte brisée is the French version of basic shortcrust: flour, butter, water, salt, no sugar. It’s used for both sweet and savoury, from quiches to fruit tarts.
Can I make pâte brisée ahead of time?
Yes, easily. The raw dough keeps in the fridge for up to three days wrapped tightly, or freezes for a month. Thaw overnight in the fridge before rolling. You can also freeze it already rolled and lined in the tin.
Do I need to blind bake pâte brisée?
For wet fillings, or any filling that doesn’t bake long, yes. Blind baking (with baking beans) sets the base so it doesn’t go soggy. For something like a quiche that cooks slowly, many people fill it raw, though a quick blind bake still gives a crisper bottom.
Should I use egg yolk or water?
Either works. Water gives the classic, neutral shortcrust pastry. An egg yolk makes it a bit richer, gives a cleaner slice, and seals the base better against wet fillings. If you use a yolk, you’ll need slightly less water.


 Prep Time 10 minutes
  Total Time 1 hour 10 minutes
  Servings 1 pie
Description
Ingredients
- 250 gr plain flour
- 125 gr unsalted butter cold, cut into small cubes
- 1 pinch salt
- 50 ml water add gradually
- 1 egg yolk ≈20 g
Equipment

Instructions
1. Sable the butter and flour
- Put the sifted flour and salt in a bowl or on your work surface, add the cold cubed butter, and rub it in with your fingertips until the mixture looks like coarse, damp sand with no visible lumps of butter. Work quickly and use only your fingertips to keep the butter cold.
2. Add the egg yolk and water
- Make a well in the middle. Add the egg yolk (if using) and most of the cold water. Bring it together with your fingers until it forms a rough, shaggy dough. Add the last of the water only if it won't come together. Don't knead it, stop as soon as it comes together.
3. Fraise the dough
- Tip the dough onto a work surface. Push small amounts away from you with the heel of your hand, smearing them flat, then gather back together and repeat once. Stop as soon as the dough is smooth and holds together.
4. Rest the pastry
- Press the pastry into a flat disc, wrap in cling film, and chill for 1 hour.
5. Roll and use
- Roll the chilled dough out on a lightly floured surface to about 3mm thick. Line your tart ring(s), trim the edges, and prick the base with a fork.
6. Second chill
- Chill the lined tin for another 30 to 60 minutes before baking. This stops the sides slumping in the oven.
Notes
- Keep everything cold: Cold butter, cold water, cold hands. If the dough turns greasy, chill it before carrying on.
- Fingertips, not palms: Palms melt the butter. Light hands give you the sandy texture you want. Don’t add all the water at once.
- Flours vary: Add most, bring it together, then add the last splash only if needed.
- Both rests matter: One hour after mixing, 30 to 60 minutes after lining. Skip either and the edges slump or the crust toughens.
- Make ahead: Keeps 3 days wrapped in the fridge, or a month frozen. Thaw overnight in the fridge before rolling.
Share your feedback and spread the love!
If you try this recipe, I’d love to hear how it turns out! Leave a ★★★★★ rating and your thoughts in the comments, it helps fellow French foodies discover this recipe too. Snap a photo and tag @obviously.french on Instagram. Come talk about it in our Facebook group. And don’t forget to save this recipe to Pinterest so you’ll always have it handy for your next French-inspired meal!