Disclosure: This post may contain affiliate links which provide us a small commission when used for purchase. Please read my disclosure policy for more information. I am grateful for your support!

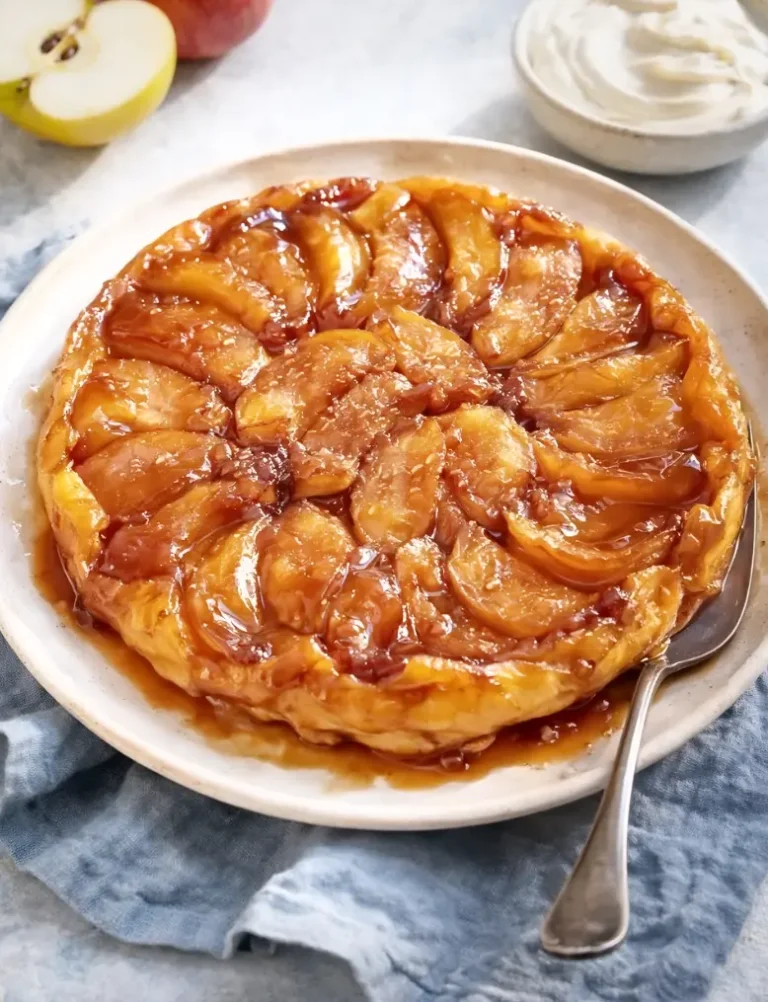
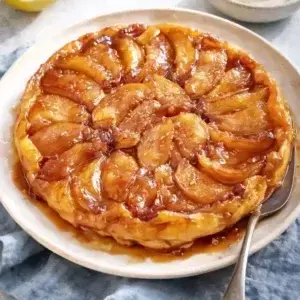
Tarte Tatin might be my favourite way to eat apples. I know it has a reputation for being tricky, but let me reassure you: even an imperfect one tastes wonderful! So don’t be put off if the first couple aren’t picture-perfect. They’ll still disappear.
For me the caramel has always been the hardest part. It goes from just right to burnt in seconds, so I tend to put the apples in a touch too early, before it’s as dark as it should be. Not perfect, I know, but I’d rather that than that awful burnt taste. I’ll be honest, I still haven’t quite mastered it. But I’m getting there, and so will you.
And the same upside-down trick works with vegetables too. My onion tarte tatin and leek tarte tatin are the savoury cousins of this sweet apple tatin.
Table of Contents
Where tarte tatin comes from
Tarte Tatin is named after two sisters, Stéphanie and Caroline Tatin, who ran a hotel in Lamotte-Beuvron, in the Loire Valley, at the end of the 19th century now renamed Maison Tatin. Stéphanie did the cooking, and her caramelised apple tart was the house favourite.
The story everyone tells is that she made it by accident: forgot the pastry, threw it on top of the cooking apples, baked it, and flipped it out to find something wonderful. It’s a lovely tale but also almost certainly made up. The likelier truth is that upside-down apple tarts were already a Sologne tradition, and the Tatin sisters just made this one famous. Nevertheless, we do love a good origin story, legendary or true!
These days it’s fiercely protected. A local brotherhood, the Confrérie des Lichonneux, still insists a true tarte Tatin has exactly four ingredients: apples, butter, sugar and pastry.
Ingredients
- Apples – Firm, medium-tart varieties that hold their shape (Cox, Braeburn, Honeycrisp, Reine des Reinettes). Peeled, cored and halved or quartered. Soft apples turn to mush, so this is the one place not to compromise.
- Butter – Unsalted, for the caramel. It goes in the pan first, under the sugar, and carries the whole dish.
- Sugar – Caster sugar, for the caramel. It melts into the butter and cooks to a deep amber. Don’t be timid with the colour.
- Puff pastry – All-butter, the lid that becomes the base. A ready-rolled sheet is fine (no one makes their own for this). Shortcrust is the strict-traditional choice, if you’d rather (more on that below).
- Crème fraîche – To serve. Its coolness and slight sharpness against the warm, sweet tart is the classic pairing.
A note on the pastry
Strictly, the original Solognot tarte Tatin uses pâte brisée (shortcrust), and the Confrérie considers puff pastry a modern substitution. In practice, puff is what most French home cooks reach for now (including me!), and it gives a lighter, more dramatic result. Both are lovely. If you want to be truly traditional, make your own shortcrust pastry; if you want easy and impressive, all-butter puff does the job beautifully.
How to make tarte tatin
1. Make the caramel
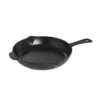
Melt the butter in your cast iron skillet, then add the sugar in an even layer and let it melt and cook to a deep, proper amber. This is the flavour of the whole tart, so take it further than feels comfortable, right to the edge of dark without burning. A pale, timid caramel just tastes of sugar; a dark one tastes of something worth eating. Watch it closely near the end, since it turns fast.
2. Cook the apples
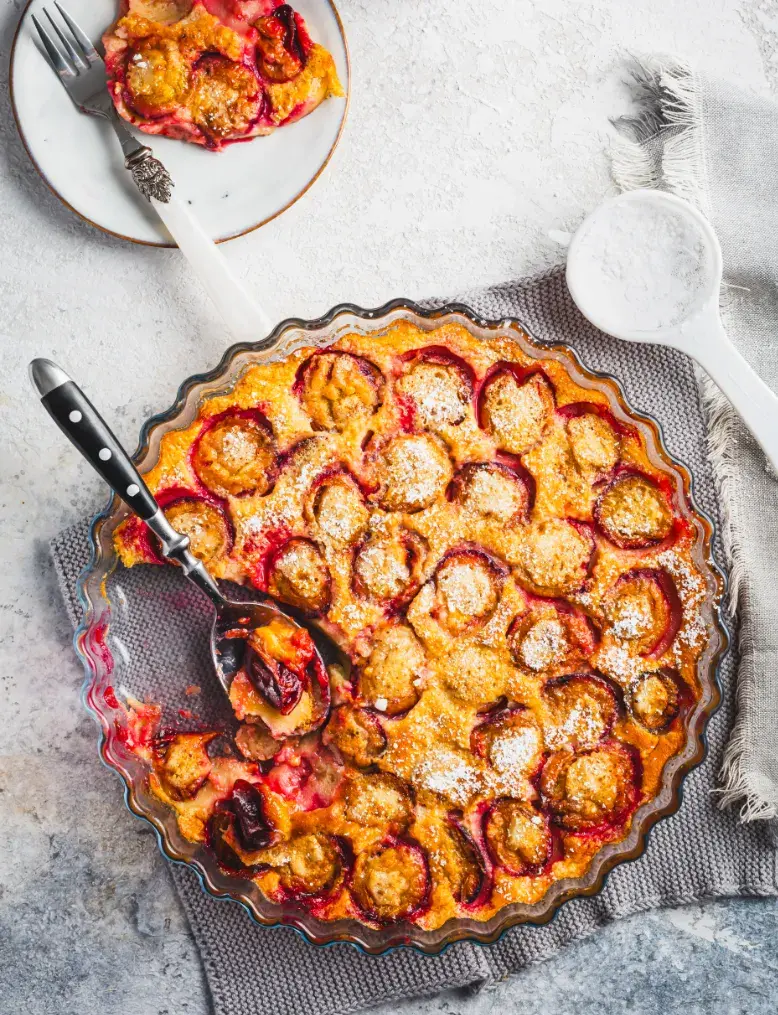
Arrange the apple halves in the caramel, packed in tightly and standing on their sides (they shrink, remember). Cook them gently in the caramel on the hob until they soften and start to take on colour and the caramel thickens around them. Don’t rush this, since the apples need to lose their raw firmness and drink up the caramel before they ever see the oven.
3. Top with pastry and bake
Lay the pastry over the apples and tuck the edges down inside the pan, around the fruit, since this folded-under rim becomes a neat edge once flipped. Prick it a few times to let steam escape, then bake in a hot oven until the pastry is deep golden and crisp.
4. Rest, then flip
This is the bit everyone worries about, and the trick is simply to be decisive. Let it rest for about 5 minutes (long enough to settle, not so long the caramel glues it to the pan), then put a plate or board larger than the pan firmly over the top. Wear grippy oven mitts, hold the plate and pan tightly together and flip in one confident motion, not slowly. Lift the pan away. If an apple sticks, just lift it out and set it back in place. Serve warm, with crème fraîche!
Tools for this recipe
Check out my favorite kitchen essentials and cookware!
- Use an ovenproof cast iron skillet (about 26cm) to make the caramel, cook the apples, bake and flip, all in one pan, with even heat throughout.
- Use a vegetable peeler and a sharp knife to peel and core the apples.
- Use a rolling pin to roll the pastry to fit.
- Use a board or plate larger than the pan and grippy oven mitts for the flip.
Tips for success
- Take the caramel dark: a pale caramel tastes only of sugar; a deep amber one gives that bittersweet edge that makes a tatin. Push it further than feels safe, just short of burning.
- Use firm apples, packed tight: soft apples collapse; firm ones hold their shape and slice cleanly. And they shrink a lot, so cram in more than looks sensible.
- Cook the apples properly on the hob: they should soften and colour in the caramel before the pastry goes on. Under-cooked here and they stay firm and pale in the finished tart.
- Rest, but not too long, before flipping: about 5 minutes. Too soon and the caramel is molten and everything slides; too long and it sets and sticks. Then flip with total commitment.
- Flip with confidence and care: grippy mitts, board held tight, one decisive motion. And mind yourself, the caramel is extremely hot, so keep hands clear of any that runs off.
How to store it
- Tarte Tatin is at its best warm on the day it’s made, when the pastry is crisp and the caramel still glossy. It’s a bake-and-eat dessert, but leftovers are no hardship!
- Keep it covered at room temperature for up to a day, or in the fridge for up to 3 days. The pastry softens as it sits, so it’s best revived in a hot oven for 5 to 10 minutes rather than eaten fridge-cold or microwaved, which leaves it soggy. Reheating also loosens the caramel again, which is how you want it.
- I wouldn’t freeze a finished tatin, the pastry suffers and the apples weep. If you want to get ahead, you can caramelise the apples in the pan a few hours before, then top with pastry and bake when you need it.
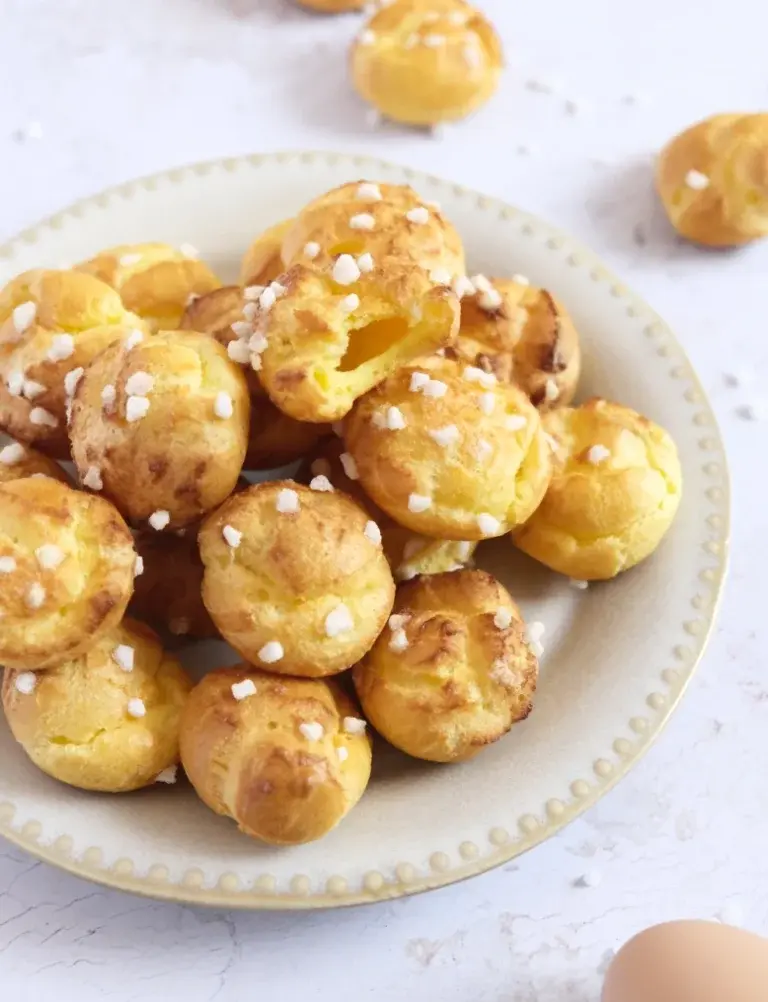
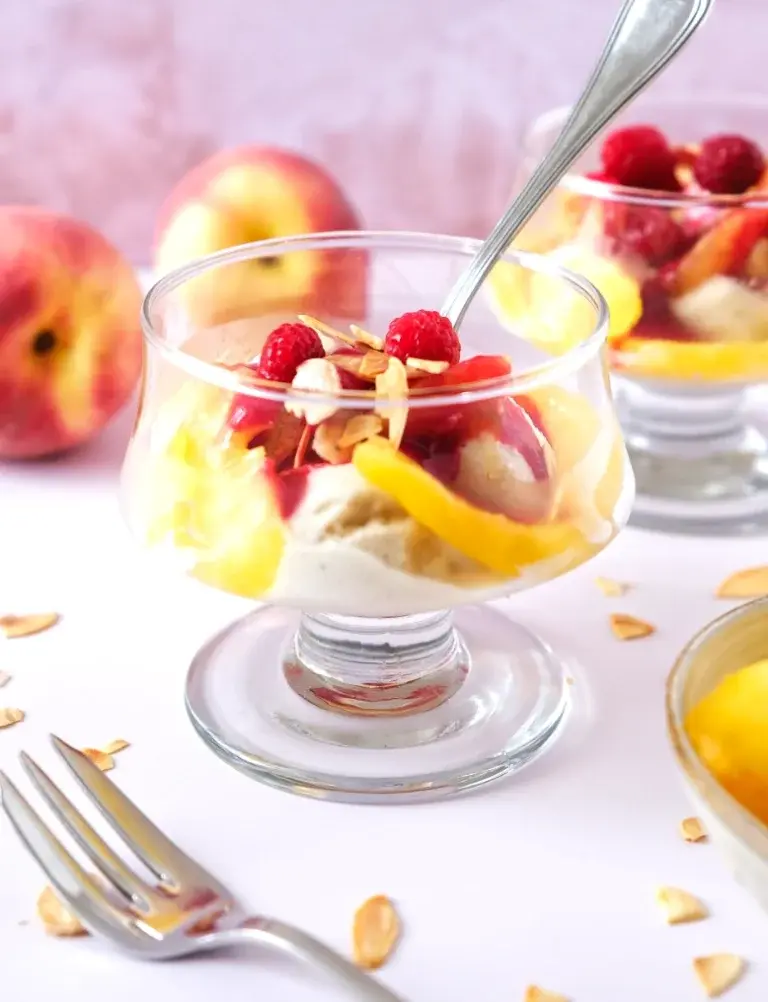
More dessert recipes to try
Variations
- Less sugar: the apples are naturally sweet, so you can pull the caramel sugar back a little, though not too far, since the caramel is the main part of the dish and needs enough sugar to cook to a proper amber. Using tarter apples (like Cox or Reine des Reinettes) is the better route to a less-sweet tatin, letting the fruit’s sharpness balance the caramel rather than cutting the sugar itself.
- Pear tarte Tatin: swap the apples for firm pears, a classic and lovely variation. The Tatin sisters’ own recipe noted it worked with pears too.
- Add a spice or a splash: a little cinnamon or vanilla in the caramel, or a splash of Calvados or rum, for a warmer, adult version. (The purists will tut, but it’s your kitchen.)
- Salted caramel tatin: a pinch of flaky salt over the caramel before the apples go in, for a salted-caramel edge.
- Savoury tatins: the same upside-down method works beautifully with vegetables, my onion tarte tatin and leek tarte tatin are savoury cousins worth a look.
FAQ
What is tarte Tatin?
Tarte Tatin is a classic French upside-down apple tart. The apples are caramelised in butter and sugar in the base of a pan, covered with pastry, baked, and then flipped over so the glossy caramelised apples sit on top and the crisp pastry underneath. It’s named after the Tatin sisters, who made it famous in the Loire Valley.
Why is my tarte Tatin soggy or watery?
Usually the apples were too juicy or too soft, or the caramel wasn’t cooked dark and thick enough. Use firm apples, cook them properly in the caramel on the hob so their liquid reduces, and take the caramel to a deep amber. A watery tatin often means under-cooked caramel.
What apples are best for tarte Tatin?
Firm, medium-tart apples that hold their shape: Reine des Reinettes and Calville traditionally, or Cox, Braeburn, Honeycrisp or Pink Lady. Avoid soft apples (they turn to mush) and very juicy ones (they make the caramel watery).
Puff pastry or shortcrust for tarte Tatin?
Both are traditional in their way. The original Solognot recipe used shortcrust pastry (pâte brisée), and purists still prefer it. Most French home cooks today use all-butter puff pastry, which is easier and gives a lighter, more dramatic result. Use whichever you like!
How do I flip a tarte Tatin without it falling apart?
Let it rest about 5 minutes after baking, no longer, or the caramel sets and sticks. Put a plate or board larger than the pan firmly over the top, hold both tightly together with dry oven mitts, and flip in one confident, decisive motion. If any apples stick, just lift them out and press them back into place.


 Prep Time 30 minutes
  Cook Time 55 minutes
  Total Time 1 hour 55 minutes
  Servings 6
Description
Ingredients
For the pâte brisée
- 200 gr plain flour
- 100 gr unsalted butter
- 25 gr caster sugar
- 1 pinch salt
- 1 egg
- 1-2 tsp cold water if needed
For the filling
- 1.4 kg apples firm, slightly tart varieties only like Reine des Reinettes
- 130 gr unsalted butter
- 150 gr caster sugar
- 1 sheet all-butter puff pastry kept cold until needed
To serve
- crème fraîche to serve
Equipment


Instructions
1. Make the caramel
- Heat the oven to 200°C (180°C fan). Melt the butter in the skillet over medium heat. Add the sugar in an even layer and cook, without stirring much, until it melts and turns a deep amber. Watch it closely near the end.
2. Cook the apples
- Pack the apple halves tightly into the caramel, standing on their sides. Cook over medium-low heat for 15 to 20 minutes, until softened and coloured and the caramel has thickened. Take off the heat.
3. Top with pastry
- Roll the pastry to a circle slightly larger than the pan. Lay it over the apples and tuck the edges down inside the pan around the fruit. Prick a few times with a fork.
4. Bake
- Bake for 25 to 30 minutes, until the pastry is deep golden and crisp.
5. Rest and flip
- Rest for 5 minutes. Wearing dry, grippy oven mitts, place a board or plate larger than the pan firmly over the top, hold tightly, and flip in one decisive motion. Lift the pan away. Replace any apples that stuck.
8. Serve
- Serve warm, with crème fraîche.
Notes
- Apple variety is everything. The Reine des Reinettes is the traditional Solognot apple, firm, slightly sharp, and it holds its shape beautifully through long cooking. Boskoop is also excellent. Avoid Gala and Braeburn, too juicy, they make the caramel watery. Avoid Bramley, turns to mush. Avoid Granny Smith, too firm and too sour.
- The recipe is genuinely four ingredients. No vanilla, no cinnamon, no lemon. The Confrérie des Lichonneux, the brotherhood that has defended the authentic recipe since 1979, is quite clear on this. The apple and caramel flavour should stand entirely on their own.
- On pastry: the traditional Solognot recipe uses pâte brisée (shortcrust), and the Confrérie considers puff pastry an inauthentic substitution. Practically speaking, puff pastry is what most French home cooks use today and it gives you a lighter, more dramatic result. Both are good. If you want to be truly traditional, use shortcrust.
- The caramel must be genuinely dark. A timid, pale caramel tastes of sugar. A deep amber caramel tastes of something worth eating. Take it further than feels comfortable, right to the edge of dark without burning.
- The flip works best at exactly 10 minutes of resting time. Too early and the tart falls apart. Too late and it sticks. Set a timer.
- Tarte tatin is best eaten warm on the day it’s made. It can be gently reheated in a low oven (150°C) for 10 minutes, but the pastry loses some of its crispness.
Share your feedback and spread the love!
If you try this recipe, I’d love to hear how it turns out! Leave a ★★★★★ rating and your thoughts in the comments, it helps fellow French foodies discover this recipe too. Snap a photo and tag @obviously.french on Instagram. Come talk about it in our Facebook group. And don’t forget to save this recipe to Pinterest so you’ll always have it handy for your next French-inspired meal!