Meringues
 Prep Time 15 minutes
  Cook Time 2 hours
  Total Time 3 hours 15 minutes
  Servings 6 large meringues
Ingredients
- 3 eggs about 90gr, at room temperature
- 90 gr caster sugar
- 90 gr icing sugar
- 1 pinch salt
Instructions
1. Prepare your setup
- Heat your oven to 100°C (90°C fan/210°F). Line your baking tray with a baking mat or parchment paper.This is crucial: your bowl and whisk must be completely clean and grease-free. Even a trace of fat will prevent the egg whites from whipping properly. Wipe the bowl and whisk with a paper towel dampened with white vinegar or lemon juice, then dry thoroughly. This removes any residual grease.Separate your eggs carefully. If even a speck of yolk gets into the whites, start over, the fat in the yolk will ruin everything. Let the egg whites come to room temperature for 20-30 minutes before whisking. Cold egg whites don't whip as well.
2. Start whisking the egg whites
- Pour the egg whites into your clean bowl. Add the pinch of salt.Start whisking on medium speed. The whites will go through several stages: first foamy and full of large bubbles, then forming soft peaks that flop over when you lift the whisk. This takes about 2-3 minutes. Don't rush this stage by going too fast, you want to incorporate air gradually for a stable meringue.
3. Add the caster sugar gradually
- Once you have soft peaks, start adding the caster sugar very gradually with the mixer still running on medium speed. Add it one tablespoon at a time, waiting about 15-20 seconds between additions. This slow addition is essential, dump all the sugar in at once and you'll deflate the whites.As you add the sugar, the meringue will start to look glossy and smooth. The bubbles will become smaller and more uniform. Keep whisking.
4. Whisk to stiff peaks
- After all the caster sugar is incorporated, increase the speed to medium-high and continue whisking until the meringue reaches stiff, glossy peaks. This takes another 5-7 minutes total.You'll know it's ready when you lift the whisk and the peak stands straight up without flopping over. The meringue should look smooth, glossy, and thick, almost like shaving cream. Rub a bit between your fingers; it should feel completely smooth with no grains of sugar. If you still feel grit, keep whisking for another minute or two until the sugar is completely dissolved.Don't overwhisk. If the meringue starts to look grainy or separated, you've gone too far.
5. Fold in the icing sugar
- Sift the icing sugar over the meringue. Using a rubber spatula, gently fold it in with large, sweeping motions. You want to incorporate the icing sugar without deflating the meringue. The icing sugar adds extra sweetness and helps create that signature crisp, shattering texture. Work gently but deliberately.
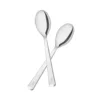
6. Shape large meringues
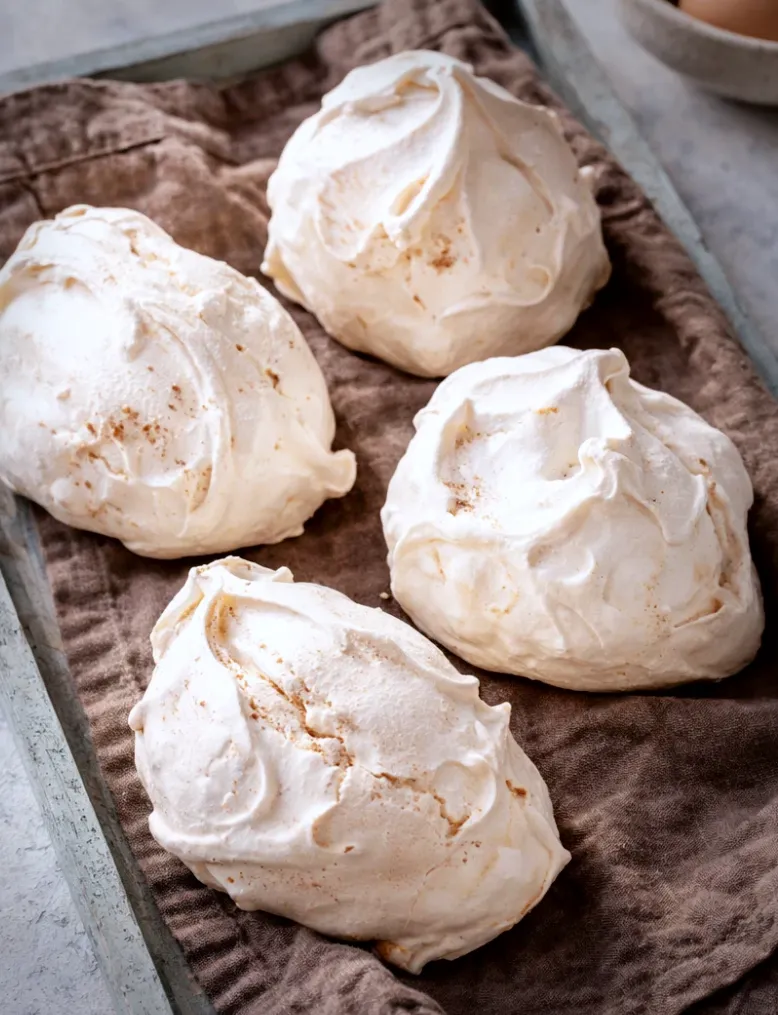
- Use two large spoons to create 6 generous dome-shaped meringues. Take a heaping spoonful of meringue, then use the second spoon to push it off onto your prepared baking mat, creating a rough dome shape. Space them well apart, at least 5cm between each meringue, as they'll expand slightly during baking.Don't worry about making them perfectly smooth. The rough, swooping texture is part of their charm and creates those beautiful ridges that turn golden at the edges. You want them to look rustic and bakery-fresh, not piped and uniform.
7. Bake low and slow
- Slide the baking tray into the oven and immediately reduce the temperature to 90°C (80°C fan/190°F). This very low temperature dries the meringues rather than baking them, creating that crisp, dry texture all the way through.Bake for 2 hours. Large meringues need this full time to dry out completely. They're done when they lift easily off the parchment and sound hollow when you tap the bottom. The outside should be crisp and the inside should be completely dry, not sticky or chewy.The meringues will develop a pale ivory color, that's traditional and exactly what you want. If you prefer pure white, don't let the oven go above 90°C.
8. Cool completely
- Turn off the oven and crack the door open slightly. Leave the meringues inside to cool completely, about 1 hour. This gradual cooling prevents cracking.Once cool, the meringues should be crisp all the way through. If they're still soft or sticky in the center, return them to the low oven for another 30 minutes.
Notes
- The traditional French ratio: French meringue uses the “tant-pour-tant” (equal weights) method: the same weight of egg whites, caster sugar, and icing sugar. Total sugar = 2x the weight of egg whites. For this recipe: 90g egg whites + 90g caster sugar + 90g icing sugar = 180g total sugar. This is the classic French proportion found in virtually all traditional recipes.
- Why two types of sugar? The caster sugar is whisked into the whites to stabilize them and create structure. The icing sugar is folded in at the end, it adds extra sweetness and helps create that signature crisp, shattering texture. Both are essential to proper French meringue.
- Room temperature matters: Room temperature egg whites whip to greater volume than cold ones.
- Don’t make meringues on a rainy or humid day. The sugar absorbs moisture from the air. On humid days, your meringues will never crisp up properly and will turn sticky and soft. Wait for a dry day.
- Store cooled meringues in an airtight container at room temperature for up to 2 weeks. Don’t refrigerate them, the moisture will make them sticky. If they do get soft, you can re-crisp them in a low oven (90°C) for 15-20 minutes.
- Troubleshooting weeping meringues: If your baked meringues develop sticky beads of moisture on the surface, you either didn’t whisk long enough to dissolve all the sugar, or you baked them at too high a temperature. The sugar is weeping out. They’re still edible, just not as pretty.
- Traditional French meringues have no added flavoring, just the pure sweetness of sugar and egg whites. If you want to add a little something, you can add vanilla, use 1/2 tsp vanilla extract folded in with the icing sugar.
About this recipe
My “goûter” or “4 o’clock” after school was almost always meringues. In France, the “goûter” is the 16:00 snack that every child has between school and dinner, and mine came from the bakery two streets from my house. A plain white meringue, slightly golden at the tips, wrapped in a small paper bag. I would eat it walking home, trying to make it last longer than it ever did. The whole thing would shatter at the first bite and dissolve before I’d taken three more steps. That texture, that immediate, clean sweetness that disappears almost as soon as it arrives, is what a proper french meringue recipe is chasing.
Three types of meringue, and why this is the one to know
French pâtisserie recognises three distinct types of meringue, and understanding the difference helps you know what you are making and why. Swiss meringue heats the egg whites and sugar together over a bain-marie before whisking. Italian meringue pours hot sugar syrup into the whites while they whisk, producing something extraordinarily stable and silky. Both are brilliant in their own context, but both require more equipment and more precision than most home bakers need most of the time.
French meringues are made entirely cold. Egg whites whisked with sugar until stiff and glossy, then baked low and slow until completely crisp inside and out. No thermometer, no sugar syrup, no bain-marie. Just technique, patience, and an oven you can trust.
A recipe with meringue that goes back three centuries
The first written french meringue recipe appears in François Massialot’s cookbook from 1692, though the technique was almost certainly known before that. The name itself is contested: some trace it to the Swiss town of Meiringen, others to a Polish origin, and a stubborn few insist it is simply French. By the time Marie-Antoine Carême was codifying French pastry in the early 1800s, meringues were already a cornerstone of the repertoire. They appeared in elaborate desserts for aristocratic tables and in simple pâtisserie windows in equal measure. They still do.
The traditional french meringues method is worth understanding because it is deliberately pure. No cream of tartar, no lemon juice, no vinegar, none of the stabilisers that appear in British and American baking traditions. The French method relies entirely on technique: whisking properly, ensuring the sugar dissolves completely, and baking at the right temperature for long enough. Get those things right and the stabilisers are unnecessary.
Getting the bake right
Low and slow is the only way. French meringues need a long bake at a low temperature, not to cook them in the conventional sense, but to dry them out completely. The inside should be as dry and crisp as the outside. If you pull them too early the centre will be soft and slightly sticky, which is pavlova territory rather than proper meringue territory. The French are very particular about this distinction.
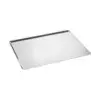
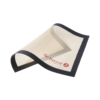
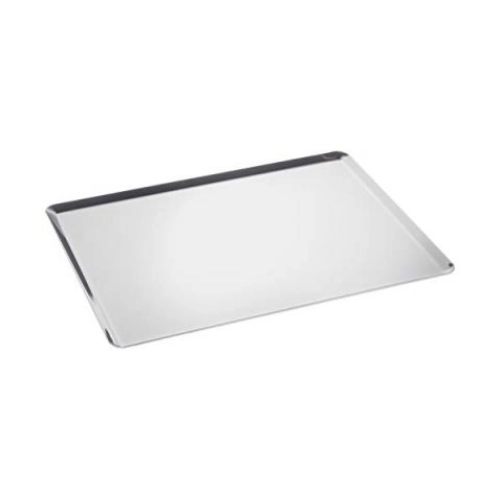
The baking surface matters considerably. Meringues need even, gentle heat from below and a surface they will release from cleanly once baked. I use the De Buyer stainless steel baking tray for this, laid with a De Buyer baking mat on top.
The stainless steel distributes heat evenly across the whole tray, which means every meringue bakes at the same rate rather than the ones at the edges catching faster than the ones in the middle. The baking mat gives the meringues a non-stick surface to sit on through a long, slow bake, and they lift off cleanly once cooled without any of the base sticking behind. De Buyer has been making professional French kitchen equipment since 1830, and for a recipe this precise, having the right surface genuinely changes the result.
The practical side of french meringues
Home bakers in France have always made meringues when there are leftover egg whites in the fridge. Made a batch of pastry cream or a tart that called for yolks only? The whites go into meringues. They keep for weeks in an airtight container, which makes them one of the most practical things you can bake. Make a large batch on a quiet afternoon and you have something ready for dessert, for a goûter, or for anyone who walks through the door unexpectedly.
Simple, economical, and when the texture is right, genuinely impressive. That is french meringues.
Share your feedback and spread the love!
If you try this recipe, I’d love to hear how it turns out! Leave a ★★★★★ rating and your thoughts in the comments, it helps fellow French foodies discover this recipe too. Snap a photo and tag me @obviously.french on Instagram if you’re sharing your bake or cooking online. Don’t forget to save this recipe to Pinterest so you’ll always have it handy for your next French-inspired meal!
Disclosure: Just so you know, this post contains sponsored content and/or affiliate links, If you make a purchase through these links, I may receive a small commission. Doesn’t cost you anything extra. I only link to things that are actually worth your time. All opinions are my own!